Container Essentials
This is the text component of the course Container Essentials, hosted on The Taggart Institute.
AI-Free Disclaimer

No part of this book was generated by a large language model such as ChatGPT or Google Bard. The prose and code you see here was created by humans, mostly by me, Michael Taggart, with help from open source software authors and contributors.
Copyright
Although this repository is open source and suggestions in the form of Pull Requests are welcome, this remains the intellectual property of The Taggart Institute, LLC, under the following license:

This work is licensed under a Creative Commons Attribution-NonCommercial-NoDerivatives 4.0 International License.
Course Overview
This course serves as a general introduction to the concepts of containerization, and the practical uses of containers to deploy software, use tools, and host services. The course will focus on Docker containers, but also explore the use of alternative container runtimes.
As always, we break down our learning objectives between skills and concepts.
Skills
By the end of the course, the learner should be able to:
- Install Docker on a fresh system
- Download images from an image registry
- Run containers
- Build new images from a Dockerfile
- Launch apps with Docker Compose
- Write Compose files to create multi-container applications
- Configure Docker in Swarm Mode
- Apply cgroups, resource constraints, and other security best practices
- Replace Docker with Podman or another container runtime
Concepts
By the end of the course, the learner should understand:
- The difference between containers and virtual machines
- The relationship between images and containers
- How containers and images are layered
- Why containers should be ephemeral, and how to work with that ephemerality
- How data can persist beyond a single container’s lifecycle
- How Docker networking connects and isolates containers
- How Docker Swarm scales containerized applications
Prerequisites
Although this is an introductory course, fluency with the Linux command line is expected. If you need a refresher, we have a course for you!
Materials/Resources
Learners will have two options for completing the labs: using a local virtual machine provisioned with VirtualBox, or using Azure cloud services. While the latter will require an account, the course will be completable with the Free Trial services. This method is offered so that learners who do not have adequate local computing power can still participate in the labs.
We will deploy two Ubuntu virtual machines, each with:
- 2 CPUs
- 2 GB of RAM
- 30 GB of disk space
So if you choose the VirtualBox route, be sure you have adequate compute resources.
The TTI Community
Discussion and support for this course takes place on The Taggart Institute. If you haven’t already, please consider joining the community of learners there!

Acknowledgments
This course would not exist without the support and feedback from the incredible Faculty of The Taggart Institute. My utmost thanks to them for their review of this material before publication.
Gratitude also for the wider TTI community, for their ongoing support and commitment to our mission.
I also have to thank my incredible wife, who tolerates the late-night content creation, video recording sessions, and conversations about arcane technology in pursuit of this mission.
And a special thank you to my baby daughter, who kept me company on the many nights over which this course was written.
1-1: Why Containers?
“Works on My Machine”
So you’re a software developer, and you’re creating a web application for multiple clients. This thing has several front-end and back-end dependencies, many of which are version-sensitive. You’ve targeted specific versions of these dependencies based on your needs, but these are not the newest around.
The application also relies on a database which in turn has version-specific dependencies. You’ve made certain that the app runs smoothly in the intended environment, but here’s the trick: how can you guarantee that the production environment your clients will deploy is what you’ve promised will work?
Traditionally, the answer would be to deploy the application in a virtual machine, and provide the VM image to clients, guaranteeing the end user’s deployment mirrors the developer’s. This is essentially shipping “Works on my machine” as a service.
So what’s the problem?
For one thing, VMs come with a lot of excess baggage. Each virtual machine is a completely emulated hardware set and operating system, on top of which we add the application and its dependencies. If we imagine several applications like ours, that’s a lot of redundancy!
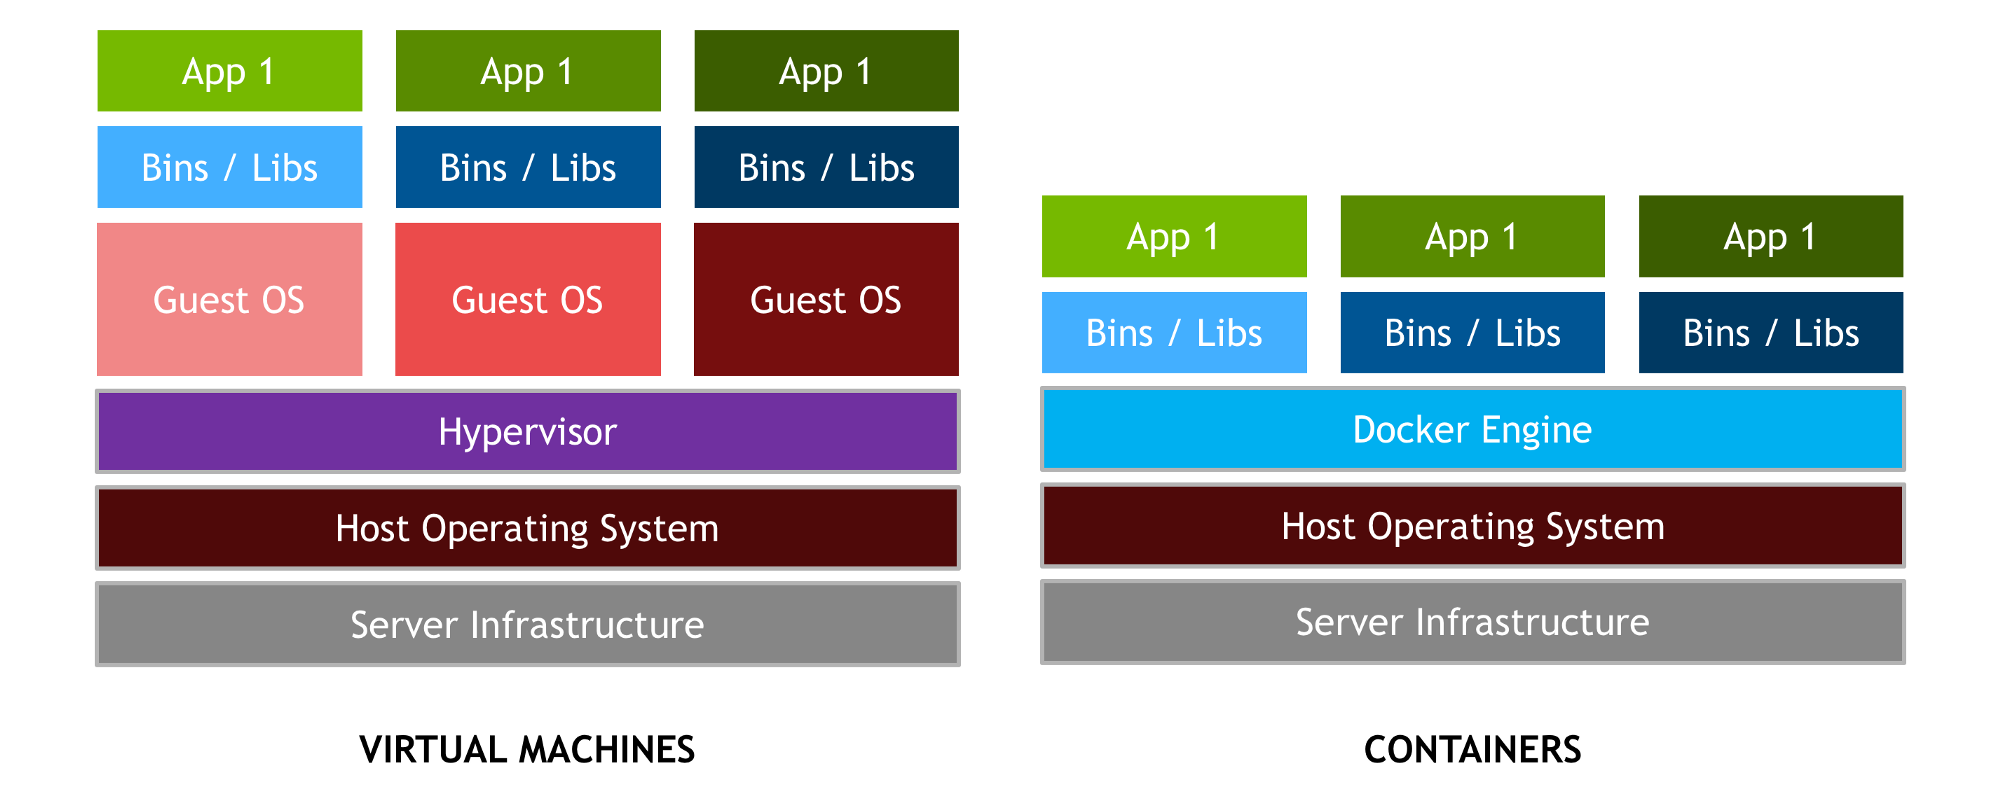
Source: Devopedia
Enabling Patching
And what happens when our users update that VM as part of routine and appropriate patching? Will they be forced to update the dependencies our app relies on, before we’re ready to update our app to use the new version? Our users should keep their VMs patched, and our software’s requirements should not stand in the way of that objective.
What if we could use a single operating system, but then isolate multiple applications and their dependencies, sharing what could be shared, and keeping isolated what shouldn’t be?
That’s what containers do. We’re able to ship our app and dependencies without the overhead of a full virtual machine. Each container is a predictable environment we can provide to users, who can deploy easily and with confidence that the app will work “out of the box.” What’s more, the host machine for these containers can be updated as normal without impacting the operation of the containerized application.
Sane Deployment Targets
Let’s talk about that “box” we ship to users. Published software can take all kinds of different shapes, from .msi installer packages to tarballs of source code. Each has benefits and drawbacks, as do containers.
For developers, containers represent a sane deployment target—put another way, a sensible endpoint in the software development pipeline. Container technologies also tend to integrate well with continuous integration/continuous deployment (CI/CD) tools, making containers even easier to target as a final product.
For consumers/users, containers represent a standard deployment mechanism: learn how to use containers, and you’ll be able to reasonably deploy a wide array of applications in the same way, on the same infrastructure.
Bad Reasons for Containers
If you noticed that no form of the word “secure” has appeared in this explanation, well done; that’s entirely intentional. By themselves, containers are not a security control. Thinking of them as such is courting disaster. Between misconfigurations, container escape techniques, and simple application requirements, the “isolation” afforded by containers is by no means a firewall, or even an impenetrable sandbox for your code. They can be made more secure (or less), but that’s about hardening the solution. It is not itself a security solution.
Nor do containers obviate the need for vulnerability management! It’d be all too easy to say “No more need to patch; our app and dependencies are sandboxed!” Nothing could be further from the truth. If anything, shipping containerized applications obliges developers and maintainers to take stronger security measures with their products, because containerized software often eludes traditional vulnerability management. As we’ll describe later, it’s important to consider what a secure development pipeline looks like. Once again, containers are not by themselves a security control.
Containers, or Docker?
Hopefully I’ve made a compelling argument for the benefits of containerized applications. Most folks who have heard of containerization have probably heard of Docker, the most common container implementation. But Docker is just one instance of a specification defined by the Open Container Initiative. So why focus on it?
Prevalence and familiarity, mostly. Although other container technologies exist—and we’ll eventually discuss them in this course—Docker is unquestionably the most prevalent, and the easiest to get started with. So yes, we’ll be using Docker, that sometimes-annoying, sometimes-maligned, first-mover-advantage-haver in the container space. But through this single tool, we’ll explore broader container concepts that can apply to all implementations of the OCI specification.
Okay, now that we’ve justified this course’s very existence, let’s get our environment set up.
2-1: Lab Setup - VirtualBox
This is one of two options for setting up our lab. To use VirtualBox, we’ll of course first need it installed. It can be downloaded for all platforms at https://virtualbox.org.
Note for Apple Silicon macOS users: VirtualBox is available, but you need to visit the TestBuilds page and download the ARM Beta for macOS. Fair warning though: it is extremely unstable. It would probably be best to use another host for your VMs, or continue with the Azure Option.
Install VirtualBox
The latest version is version 7.0. Make sure you’re using that version, or some of these screenshots will look pretty weird.
Download Ubuntu ISO
We’ll be using Ubuntu 22.04 LTS for our base server. Download the installation ISO from the Ubuntu Download Page.
Create the NAT Network
Because we’ll be using more than one virtual machine, we need to create a new network in VirtualBox for both of them. Otherwise, VB will annoyingly assign both of them the same IP address!
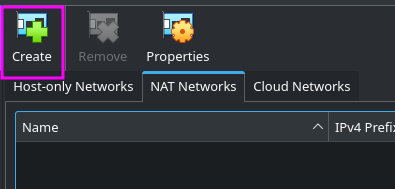
In the Tools menu, navigate to the Network section, and choose “Nat Networks.” Click “Create.”
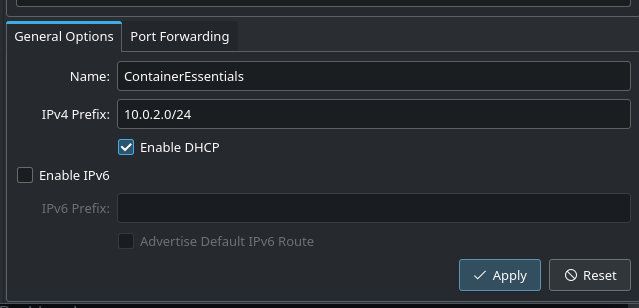
You can name the network however you like, but make sure that “Enable DHCP” is checked, and click “Apply.”
Then return to the “Welcome” section in “Tools.”
Create the Main Ubuntu VM
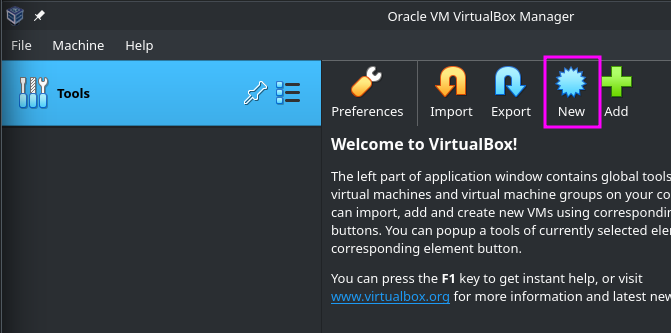
Let’s make our main VM. Click “New.”
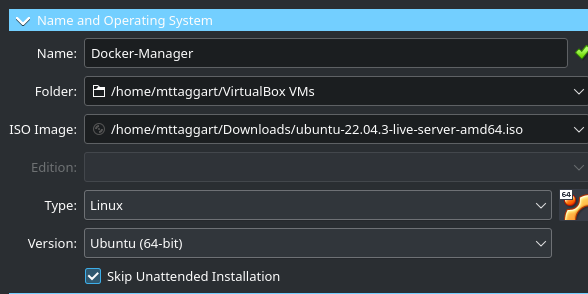
Let’s name the new VM “Docker-Manager,” for reasons that will become clear a bit later. But it’s descriptive enough for now.
Select the Ubuntu ISO you just downloaded as the ISO Image. And skip the unattended installation. It’s actually more trouble than it’s worth.
For resources, 2 GB of RAM and 2 CPUs is sufficient. A 30 GB virtual hard disk will do for storage.
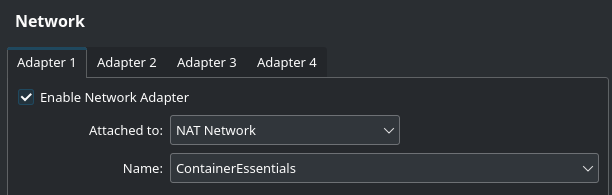
Now, before we power this on, we’re going to add this VM to our NAT Network. Go to Settings -> Network for your new VM. Switch Adapter 1 to use the ContainerEssentials NAT Network we made earlier.
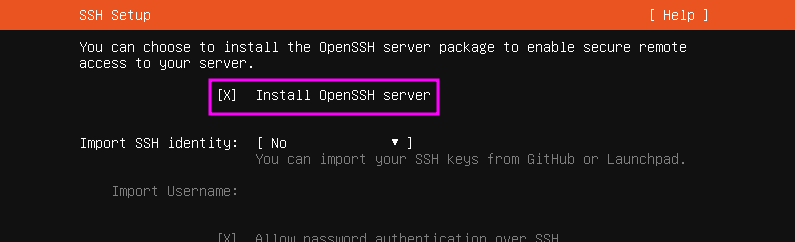
Now, power on the VM and walk through the installation steps. Defaults are fine everywhere, except that you do want to install the OpenSSH server. We’ll need that for comfortable logging in!
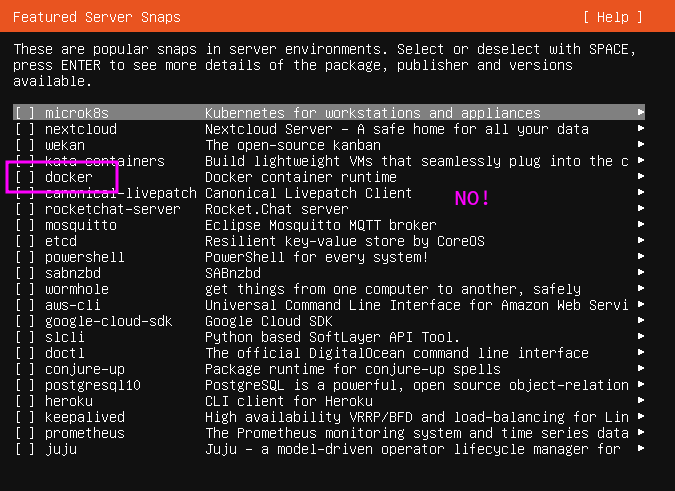
On the screen after the SSH option, you’ll be presented with several packages to install, including Docker. Do not install Docker this way! This installs an old version of Docker, and we’ll be installing it manually.
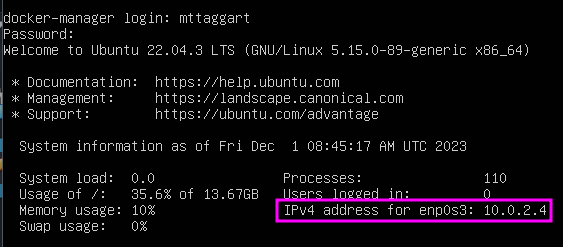
Complete the installation and reboot the server. Once logged in, take note of the IP address shown by Ubuntu.
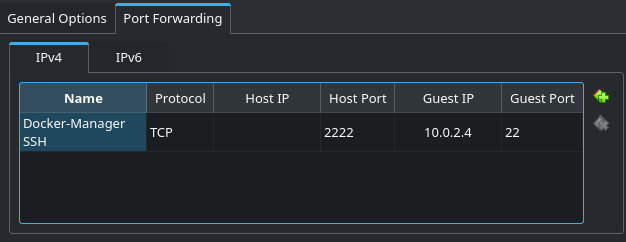
We’re going to take that IP, and go back to our NAT Network config. In the “Port Forwarding” tab, we’ll add an entry here for SSH, using port 2222 on our host, forwarding to port 22 on the IP address we just saw.
We’re now set up to log into the server over SSH, which will be a much nicer experience than trying to use the VirtualBox console. In a new terminal/PowerShell window, run:
ssh -p 2222 user@localhost
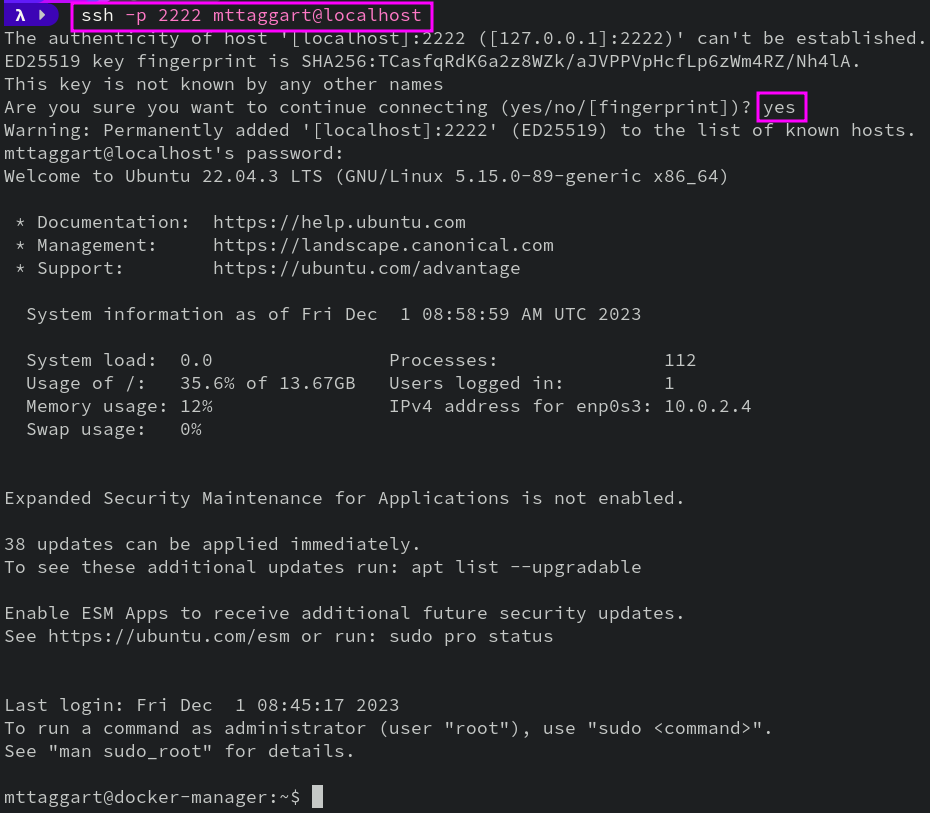
You should now be logged into your server.
Before departing the port forwarding dialog, add another rule to forward 8888 to port 80. This will be useful for testing web applications.
And that’s it for our first VM setup!. In the next lesson, we’ll install Docker and confirm it’s working.
Create the Second VM
Now, repeat the VM creation process for our second Docker machine! The only differences:
- Call this one
Docker-Workerwith hostnamedocker-worker - No need for a port forwarding rule. You can make one, but it’s just as easy to SSH into the worker machine from the manager. SSHception!
Don’t forget to copy down the IP address of the new VM though, for future reference.
If you’re comfortable with cloning VirtualBox VMs, make sure to do a full clone and not a linked clone. Yes, it takes more space, but in testing I found that linked clones kill the NAT Network DHCP for some reason.
2-2: Lab Setup - Azure
This guide is for setting up our lab environment in Microsoft Azure. It presumes that you already have an Azure tenant and a Microsoft account with global administrator privileges. If you don’t, you can sign up and get $200 in credit for creating resources, which will be more than enough for what we’re doing in this course.
Terraform Setup
This isn’t a course on Azure, even though we’re utilizing it for our lab here. Instead of making you learn all the ins and outs, I think it makes sense to use a tool that automates our deployment. That’s what Terraform does. Terraform enables the automatic provisioning of cloud resources across multiple providers, using a common syntax.
We need to perform some setup to use Terraform. Let’s get started!
Get the Terraform Plan
I’ve provided a Terraform plan for your use. If you’ve cloned the course repo, you already have it. Alternatively, download the file from that link and save it in a new folder.
I’d recommend looking over the file—and, if you’re feeling responsible, changing the default password.
Install the Azure CLI
Terraform can work with many, many cloud providers, but it often requires some help from those providers’ first-party tools. Azure is no exception. To easily get our system configured, it’s best to download and install the Azure CLI.
Once installed on the platform of your choice, be sure to run az login, so you have a current CLI session for Terraform to use.
Install Terraform
Of course, we also need to install Terraform. You can confirm it’s installed by running terraform version.
Terraform Deploy
With all our tools set up, navigate a terminal window to the folder in which you saved the Terraform plan (lab.tf). Run the following command to initialize Terraform with the required provider data:
terraform init
If all goes well, we’re ready to deploy. Terraform allows us to perform a “preflight” on our deployment to check for errors and show what changes will be made. Run your preflight with:
terraform plan
So what are we making? At base, we’ll be deploying two Linux virtual machines: docker-manager and docker-worker. However, only one of them will be accessible directly. The manager has a public IP address, and we’re enabling SSH. But don’t worry—we also configure firewall rules so that only your IP address can access the resource.
When you’re ready, run:
terraform apply
And type yes to confirm. This will create the 2 VMs in your Azure tenant.
When all is said an done, you should see some output like:
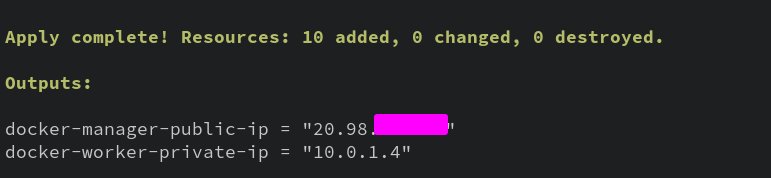
The first IP is the public IP of the Docker Manager, which you can SSH into from the computer/location you deployed from. Go ahead and log in now with user ubuntu and the password from lab.tf (you did change it, right??).
Okay, that does it for our Azure setup. Make sure you have both IPs written down, so we can use them in the next lesson to install Docker!
2-3: Lab Setup - Install Docker
At long last, it’s time to install Docker so we can get to the business of containers.
Easy Mode: The Script
Do you just want to get up and running with Docker? Great. Log into your manager VM, then run:
curl -L https://codeberg.org/The-Taggart-Institute/container-essentials/raw/main/labs/install-docker.sh | bash
You’ll need to enter your sudo password. Once it’s finished, log out and back in. You should now be able to run docker image ls and see an empty list of images.
Now from the manager VM, SSH into the worker VM and repeat the installation process.
Congratulations! Docker is installed.
Normal Mode: Explaining the Script
If you care about how the installation worked (and you should), this section is for you. Let’s break it down piece by piece.
Add Docker GPG Keys
We don’t want to rely on the version of Docker offered by Ubuntu’s own repositories; it’s too old! Instead, we’re going to use Docker’s own repos. That requires us to save Docker’s public signing key to verify the packages. The way we do that in Ubuntu has changed recently, moving away from apt-key add to manual installation in a location of our choosing. In this case, we’re going to make a folder at /etc/apt/keyrings to save keys.
# Install Docker
sudo install -m 0755 -d /etc/apt/keyrings
curl -fsSL https://download.docker.com/linux/ubuntu/gpg | sudo gpg --dearmor -o /etc/apt/keyrings/docker.gpg
sudo chmod a+r /etc/apt/keyrings/docker.gpg
Add Docker Repo
Now that we have the key, we need to use it in our definition of a new source. We represent that source with a file in /etc/apt/sources.list.d, the contents of which is a specially-formatted line defining the source as a .deb repo, signed by the key we just saved. We use some of our machine’s own info to fill in the details.
echo \
	"deb [arch="$(dpkg --print-architecture)" signed-by=/etc/apt/keyrings/docker.gpg] https://download.docker.com/linux/ubuntu \
  "$(. /etc/os-release && echo "$VERSION_CODENAME")" stable" |
	sudo tee /etc/apt/sources.list.d/docker.list >/dev/null
Install
We then update our sources and install the list of packages needed to get up and running with Docker.
sudo apt update
sudo apt install -y docker-ce docker-ce-cli containerd.io docker-buildx-plugin docker-compose-plugin
The docker Group
Finally, we add our user to the docker users group. This is a Super Bad Idea™ in production, as we’ll discuss later, but for now it means we don’t need to use sudo for all our Docker commands.
sudo gpasswd -a $USER docker
Docker is now set up and ready to run! Time to learn about these “images” and “containers” we keep mentioning.
3-1: Images
It’s time to start doing stuff with Docker. I’m a traditionalist when it comes to new tech, so we’ll begin as always with “Hello, World!” In Docker, this means a container that does one thing and one thing only: say “Hello, World!” and prove Docker works.
We’ve used the terms “image” and “container” a few times now without properly defining them. In the world of containers, an image is a snapshot of a filesystem that contains what an application needs to run. A container is an image that is actively running. There’s a bit more to it that we’ll get to, but for now: containers are running images. Images are static. They don’t change unless we update them. But containers are dynamic, containing any changes from the execution. Additionally, containers are ephemeral. They’re meant to be created and destroyed easily, whereas images remain the constant base from which new containers will be run.
Let’s see this in action. Start by confirming we have no images downloaded by running:
docker image ls
You should see a blank table.
REPOSITORY TAG IMAGE ID CREATED SIZE
Okay, nothing up our sleeves. Let’s now attempt to run a container.
docker container run hello-world
Whoah! A whole lot just happened. But helpfully, the thing that happened explained itself! As the container itself reported, first, the “Docker client” (the command-line interface) contacted the “Docker daemon” (the running service that constitutes the “container runtime”), and queried it for the image hello-world.
That’s how the docker container run command works—it takes an image name to launch as a container.
But we already demonstrated we didn’t have any images—locally. So Docker reached out to its image repository, known as Docker Hub, to look for an image of that name. Once it found it, it downloaded the latest version of that image and reported the image’s SHA256 hash.
Then, Docker ran a new container from that image, and displayed its output.
And here we are.
Let’s run docker image ls again. Hey look at that! An image by the name of hello-world has appeared. We now have the image locally, which means the next time we run a container from it, nothing needs to be downloaded.
Try it now. Re-run docker container run hello-world.
See? Just the output, no preamble.
Images -> Containers
So where did those containers get to? Enterprising learners here might have already run docker container ls and found nothing.
But here’s the thing: docker container ls only shows running containers, and our hello-world containers have exited. If we want to see exited containers as well, we need to run:
docker container ls -a
A-ha! Here we go:

Here we can see two Exited containers, one for each docker container run we performed.
Each container has its own ID, like images. They also have a name, the command being run at launch, a created time, and a status. The name might look a little goofy. That’s a default name given by Docker, but we can customize that, and many other choices about the container, with command line options. We’ll see that shortly.
A More Useful Image
The hello-world image is really just for demo purposes; we can’t do anything useful with it. Let’s go grab a base image that we can use.
docker image pull alpine:latest
What we’ve just pulled is an image based on Alpine Linux. Its small size and security focus make it an ideal base for many Docker projects. docker image ls shows that it’s only 7.34 MB! I promise that’s much, much smaller than the Ubuntu image.
Inspecting
So what can we do with this thing? For starters, we can learn more about the image. Let’s get a full readout of this thing’s details with:
docker image inspect alpine:latest
That’s a lotta JSON! At this point, we will want to install a handy tool to parse JSON on the command line: jq.
sudo apt install -y jq
Once installed, send it the output of our Docker command.
docker inspect alpine:latest | jq
We get color, for starters, but that’s hardly all. We also get the ability to slice the data for precisely the information we want. jq is really a subject unto itself, but some basic slicing can really come in handy here. Let’s learn how the image is configured to launch as a container.
docker image inspect alpine:latest | jq ' .[] | .ContainerConfig'
We should get back a subset of the larger JSON object, including the Cmd key, an array of arguments like:
[
  "/bin/sh",
  "-c",
  "#(nop) ",
  "CMD [\"/bin/sh\"]"
]
The Cmd array tells us that by default, Alpine will run /bin/sh as its startup command. You can try it now, but there’s kind of a catch.
docker container run alpine:latest
The container will run and exit instantaneously. To “capture” and interact with the launched shell before it exits, we’ll need to pass some additional command line options to docker container run. Specifically, we’ll need:
-ifor interactivity-tto create a virtual terminal device (tty) to handle the interaction
You may notice that these options directly contradict some of the options we just read from ContainerConfig. Good thing we can override them, huh?
Launching With Options
Let’s try one more time, but with options!
docker container run -it alpine:latest
Yes, you can chain option flags like that.
Oh hey, something new happened! Our command prompt changed to a tiny lil root prompt! Run hostname to demonstrate we’re in a new system now!
We’re now in a shell within the container. We can further prove it by running hostname, which will show a snippet of the full container ID.
You can also run ip a s to see that the container has an IP address within Docker’s own network (more on that later), and not the subnet we configured for our virtual machines.
When we run exit, the container will stop, and we’ll be back in our host’s shell. And now, docker container ls -a will show the exited container.
Containers -> Images
Before we move on from images, I want to demonstrate one way to create new images from our containers. Remember that running containers are simply an additional layer of changes on top of the base image. So if we can merge that layer with the base, we’ll have ourselves a new image to start from.
Let’s start by rerunning Alpine interactively.
docker container run -it alpine:latest
You might have noticed that the shell is /bin/sh, not /bin/bash. This image does not have Bash installed; that’s how barebones it is! But we could make an Alpine image with that simple creature comfort by installing it in our container.
Alpine uses the apk package manager. So to start, let’s run apk update to refresh the repos.
Then, we can run apk add bash. Now we can run bash!
Exit out of bash (if you ran it) and sh, so we’re back to our host.
Another run of docker container ls -a shows our just-exited container. But this time, we’re going to convert the container to an image with docker container commit. This takes the container ID (or name) and the new name/tag of the image.
Image tags are after the colon in our image names. They allow us to differentiate versions of the same image type. So in our case, we’ll use the bash tag to differentiate from the normal Alpine image.
Got that container ID or name? Great. Run:
docker container commit <container_id> alpine:bash
Now, running docker image ls will show a new image! We can run bash from this image, with:
docker container run -it alpine:bash /bin/bash
And there we go. We have a functioning bashified Alpine image!
This is not normally how we make new images—for any change more complicated than a simple package add, this process quickly gets onerous. Nevertheless, it demonstrates that images are based on layers of changes, and we can add layers of change introduced in containers.
In fact, images have a handy way to see the layers. Let’s run docker image history against our new image:
docker image history alpine:bash
What you’ll see is a history of changes to the layers that make up the image. You’ll see some odd commands like CMD and ADD. We’ll see those again later, but those are specific build instructions used by Docker. Alpine doesn’t have a lot of layers, but if you pull a heavier image like ubuntu, you’ll see quite a few.
Saving/Loading Images
We’ve already seen that we can grab images from Docker Hub (and other container registries), but is that the only way? Seems kinda…locked in.
Yeah, no, we don’t have to rely on image repos to save and load images. docker image save will export a TAR-formatted archive of an image—to stdout by default, for some insane reason. So if we wanted to save out our new image, we’d do:
docker image save alpine:bash > alpine_bash.tar
docker image load works in the reverse, including the use of stdin. So to load our archive as an image, we’d do:
docker image load < alpline_bash.tar
(This avoids cat abuse, which we always strive for.)
Up next, we’ll dive deeper into running containers.
Check For Understanding
Explain the difference between an image and a container. Add a new package to an alpine:bash container and create a new image from that container.
3-2: Containers
We’ve already gotten a start on containers, but there’s a lot more to running containers. For starters, we need to do a bit of cleanup. From our early experiments, we have several stopped or exited containers kicking around. While these don’t take up a lot of space, normally (they can though!), they can add up. We can remove old containers with docker container prune.
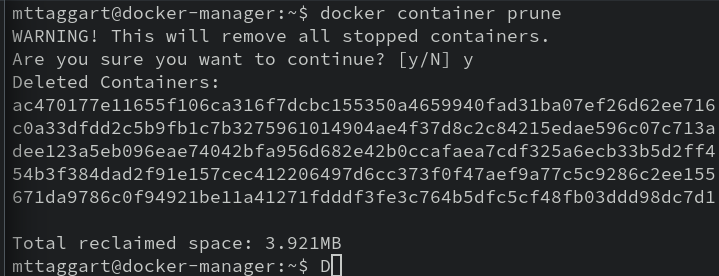
See? Not a lot of space reclaimed, but maintaining a clean working environment is a good habit to get into.
For this lesson, we’ll need the nginx:latest image. Go ahead and pull it down now.
docker image pull nginx
The Nginx image is a solid starting point for our exploration. It’s Debian-based, so we have a familiar package manager available, but also: the way we use the container relies on several common, important techniques.
Attached/Detached
But before we jump into Nginx, there’s more to do with Alpine—I promise, it’s related. We’ve seen that if we run docker container run -it alpine, we get a shell, because we’ve launched the container in interactive mode, and allocated a pty. But what if we wanted the container to launch, but do so in the background so we could use it later?
That’s possible with the -d option, for “detached.” Go ahead and try it.
docker container run -dit alpine
Yes, you can chain option flags. And also yes, we still need the
-iand-tflags.
What you get back, instead of a shell, is the id of the now running container. Check it out with docker container ls. Hey look! An Alpine image is running. Notice the COMMAND column show /bin/sh.
We launched the container in detached mode. We can, as you might imagine, attach to the running command.
docker container attach <container_id or container_name>
There’s our container shell!. Run hostname to confirm you’re in the Alpine container.
Now we run exit to leave the container. But wait—docker container ls now shows no containers!
When we ran exit on the running command—in this case, the shell we attached to—the container stopped because its running command stopped.
This is hardly ideal. We need a way to execute commands within the container without killing it on exit!
Exec
There is a way: docker container exec. This command will run a separate command from within the container. We can run single commands simply enough. Let’s try it with:
docker container run -dit alpine
docker container exec <alpine_id> hostname
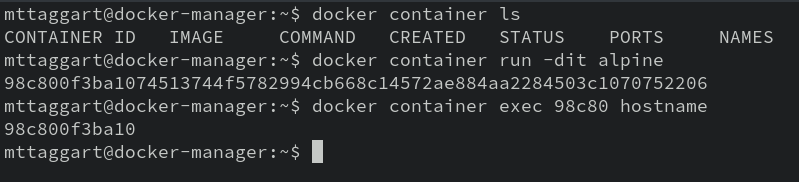
Notice I used just a small snippet of the ID? Yeah you can do that, or the goofy container name Docker creates.
Now if we want a shell, we have to reintroduce -it to the mix, because of course this command is interactive and requires a pty. Let’s try this one.
docker container exec -it <alpine_id> /bin/sh
And now we have a shell again! But this time, exiting won’t kill the container, because this is not the main process! Run exit and then docker container ls to confirm that the container persists.
Now that we know how to attach, detach, and exec, we can move on to some more interesting containers. Feel free to shut down the Alpine container with docker container stop <container_id>.
Nginx
We downloaded Nginx for a reason. Let’s start using this thing!
docker container run -d nginx
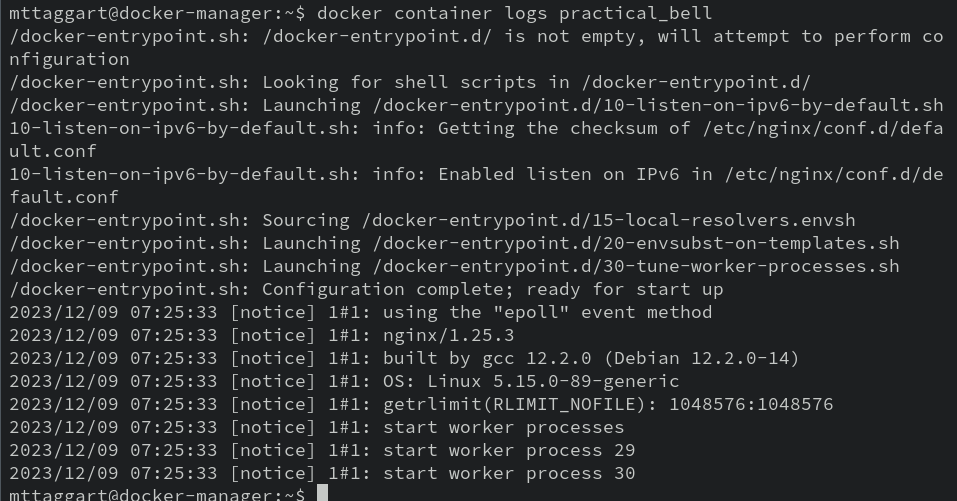
Of course we want to run a service like a web server detached. But docker container ls tells us that the COMMAND for our Nginx container may not be a simple shell. That means there may be useful output getting generated that we can’t see. You know, like application logs.
Spoiler: there are.
But good news: we can take a peek at that output with docker container logs <container_id>.
Ports
Now, nginx is a web server, so ostensibly we would hope this thing is serving some HTTP for us. Let’s check.
curl localhost
What gives? Turns out, although we launched nginx in detached mode there’s more to do in order to expose network services from container to host. It’s not so bad though—the syntax is -p <host port>:<container port>. Let’s run docker container stop with the current running container ID, and then we’ll try again with -p.
docker container run -d -p 80:80 nginx
Now, when we run docker container ls, we see an entry in the PORTS column that shows that the host port 80 is forwarded to the guest port 80.
Let’s try curl localhost one more time.
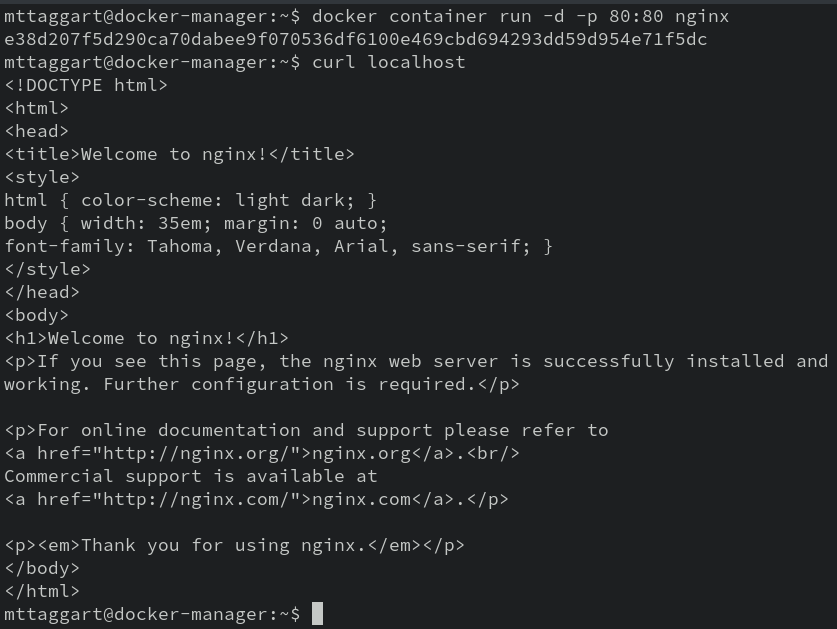
There we go. Our webserver is serving some web!
Adding Content
It’s cool that we have a working webserver, but wouldn’t it be cooler if we could serve, y’know, actual content? Not just the default Nginx page? How can we do that?
There are several ways. We’ll start with the silliest first: editing files inside the container.
Taggart, this is a ridiculous way to deploy web content.
Yes it is! But you’ll learn something doing this. Stick with me.
We already know how to exec to interact with our containers. Turns out, the nginx image has bash! Let’s get a shell going.
docker container exec -it <nginx_container> /bin/bash
Echo
First thing we need to know is where Nginx is serving up content from. We could read the documentation on Docker Hub, simply cat out /etc/nginx/nginx/conf.d/default.conf in the container. That tells us the root of the site is at /usr/share/nginx/html. So that’s where we need to put new data.
Let’s try it out.
echo "<h1>New Page</h1>" > /usr/share/nginx/html/hello.html
We don’t have to leave the container to test this out. Running curl localhost/hello.html should confirm our page is now accessible!
Echoing content into a file is cool, but not for large amounts of data. What if we wanted to use a text editor in the container? If we try to use nano or vim, we’ll find they aren’t there. But you know what is?
apt.
# Pick one
apt update && apt install vim nano
With our text editor within the container, we can now directly edit or create files. I’m going to edit index.html.
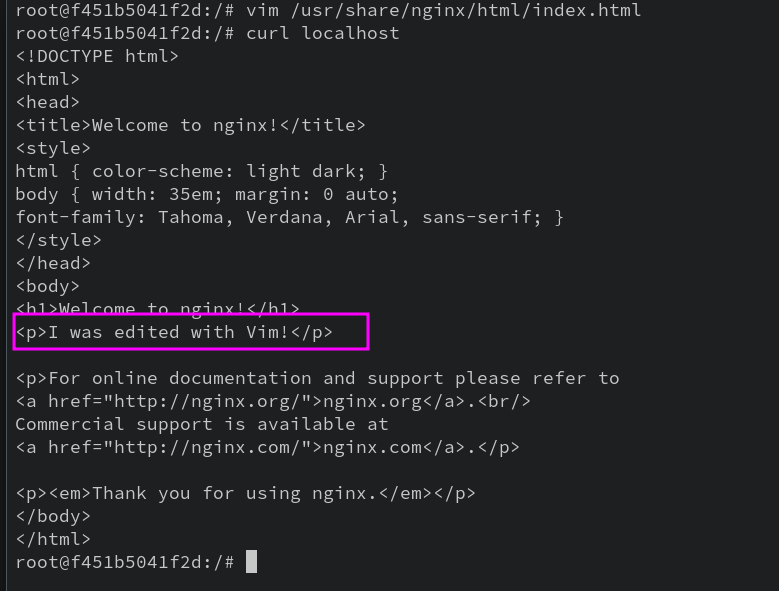
Okay, so now we know that we can add missing packages to running containers and make changes directly within them.
But this is a terrible idea, and goes against everything containers are supposed to do for us. Let’s see if we can add content without executing command in the container.
Copy
Another option might be to create our content outside the container, and then move it into the container somehow. docker container cp does just that.
Exit out of the container (if you’re still in it), and then let’s create a new HTML file on our host.
echo "<h1>Made on the host</h1>" > host.html
Now we can use docker container cp to move this file into the container. The syntax is a little wonky. It goes: docker container cp <source> <container>:<destination>. Here’s an example:
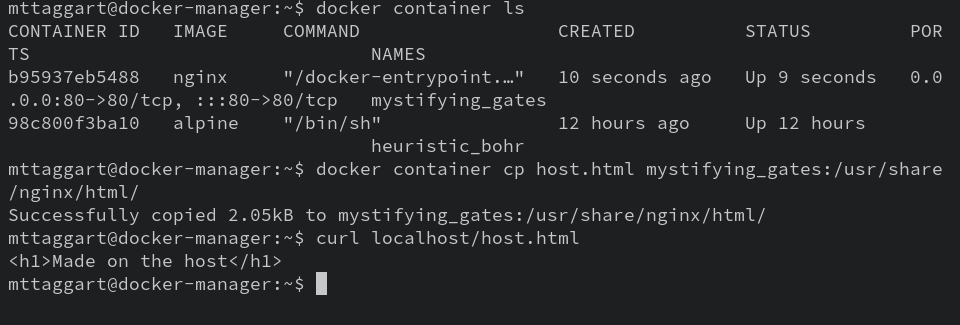
We can use the syntax in reverse to copy data out of containers.
While this is a step in the right direction, we still shouldn’t have to modify the container after it’s running. We need a way to include our content when the container starts.
There are two ways to do this: include the content as part of the base image, or mount the necessary data as a volume to the container.
We’ll explore creating our own images in the next lesson. For now, let’s check out volumes.
Volumes
Docker volumes are in fact a pretty deep concept, and we’re only scratching the surface in this lesson. Still, they’re pretty handy! We can use -v to mount an absolute path on the host to a location in the container.
So for our web content, let’s make a new folder on our server.
mkdir webroot
And let’s put a file with some HTML in there.
echo "<h1>I'm from a volume</h1>" > webroot/index.html
Now we can mount this directory as a volume in a new nginx container. Oh, you should docker stop <nginx_container> first. This is where we put all the command line options together, so it’s going to look a little wacky.
docker container run -ditp 80:80 -v $(pwd)/webroot:/usr/share/nginx/html nginx
The result should be something like:
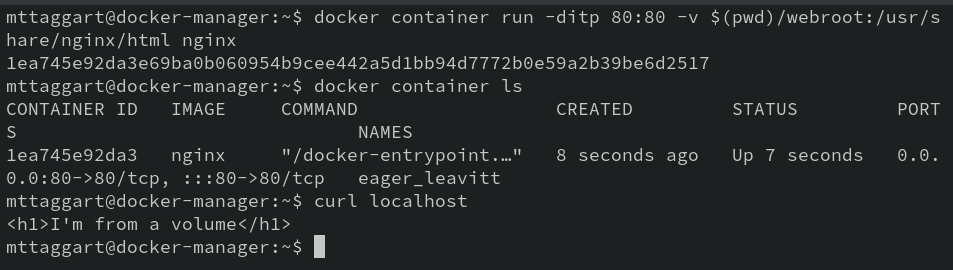
We’ve successfully overwritten the existing path in the container with our volume. This attachment of a host directory to the container is known as a bind mount.
As I said, there’s a lot more to volumes, but we’ve finally arrived at a method for attaching content to a container that doesn’t require us to modify a container that’s already running.
Why does this matter? Remember that containers are intended to be ephemeral. We should be able to blow them away and bring up new versions without any harm to the data we care about. That means our persistent data has to exist separately from the container, as in our volume example. And we don’t want to perform any manual steps post-provisioning on the container, which is why the docker container cp approach is not so great.
But congratulations; you’ve deployed your first containerized web application! It might be crazy simple, but the deployment principles will remain similar, regardless of of the complexity of the application logic. That’s the beauty of infrastructure-as-code.
That’s right—you’re DevOpsing now.
Soon, we’ll be making our own images with the resources we need inside. But before we get there, let’s build on our knowledge of running containers to take advantage of some complex tools that can be difficult to install otherwise.
Check For Understanding
-
What is “detached mode”? When do we want to use it when starting a container? What is the command line option flag to do so?
-
Deploy a second Nginx container running on port 8080. Modify what it serves as its default page using a bind mount.
3-3: Running Tools in Containers
We have more to learn about making images, but first, let’s apply what we already know to make our lives a little easier. Very often, we’ll want to run a tool that has complex dependencies. Or maybe, the dependencies are so old, it would be complicated to install them on our system (looking at you, Python 2).
Docker can really help in these situations. In this lesson, we’re going to go through two examples of how to use Docker to avoid installation complexity.
Example 1: Python 2
Python 2 has been deprecated for a while now—nearly three years, as of this writing. And yet, it is common to find tools that remain in Python 2, having never been updated. The Exploit Database is a prime example. Countless proofs of concept that were written once and never given a second thought now molder in unsupported syntax. And while 2to3 exists, it’s hardly perfect. It would be easier to just run the old code with Python 2, but installing Python 2 on a system is increasingly difficult.
Instead, it would be rad if we could use Python 2 for a hot minute when we need it, then do away with it when we’re finished.
With Docker, we can!
The Python Foundation maintains an official Docker image, with tags for multiple version of the language available. A search for 2.7 amongst the tags reveals that yes, there are still old versions of Python available.
So to start, let’s pull 2.7.18.
docker image pull python:2.7.18
You might notice during this
pullthat the image has a lot of layers! You should check them out either on the Docker Hub page, or usingdocker image history. Another opportunity to see how images are built from layers of change!
Now, let’s make a quick Python 2 script. Let’s keep it simple. Save this (or something like it) to 2script.py.
# The old print syntax is the easier distinguisher
print "I'm from Python 2!"
Think first, about how you’d use Docker to get this script to Python 2.
Got it?
Hopefully you arrived at using volumes to get the script directly into the container!
We know now how to mount host locations in the container. Let’s use that to run a Python 2 script that’s been mounted inside the container.
docker container run -v $(pwd):/scripts python:2.7.18 python2 /scripts/2script.py
You should see your script output! And there we go-we just used Docker to run Python 2 code without having to mess up our host system!
Example 2: Rust
In security, it’s common to need to use a tool that’s been written in an unfamiliar programming language. And as some kind of gatekeeping technique (or just laziness?), tool developers will only provide source instead of compiled binaries. And while we could install the entire toolchain on our system, with Docker, we don’t have to.
Let’s start by cloning down a Rust-based tool. Let’s try, I dunno, PwFuzz-RS, a password list mutator by yours truly.
git clone https://github.com/mttaggart/pwfuzz-rs
And now, let’s pull the Rust Docker image.
docker image pull rust
We have our pieces; now we need to put them together. We know how to mount volumes to specific locations inside the container. We’ll mount the pwfuzz-rs folder to the location /pwfuzz-rs in the container. Remember that volume mounts in Docker need absolute paths, so that will be like $(pwd)/pwfuzz-rs:/pwfuzz-rs.
To compile the project, we would use the command cargo build --release, so that’ll be the final part of our command. But to make our lives a little easier, we’re going to add two additional command line options.
First, -w sets the working directory for the container—in our case, /pwfuzz-rs. This makes the cargo invocation actually work, because it’ll be looking for specific files in the directory from which it’s run.
Second, -u runs the container as a different user. By default, Docker containers run as root, but that would mean our host user wouldn’t own the compiled targets! The user is passed as a user:group, which we can do in a bash one-liner with $(id -u):$(id -g).
Assembling all of these options, we get one hilariously long Docker one-liner:
docker container run -v $(pwd)/pwfuzz-rs:/pwfuzz-rs -u $(id -u):$(id -g) -w /pwfuzz-rs rust cargo build --release
This might take a minute to run, but look at it go! Rust is compiling pwfuzz-rs from source. When all is said and done, you’ll find a new folder in pwfuzz-rs. The target directory contains compile targets, and inside of that folder, you’ll find release, which contains our compiled binary! YOu can run pwfuzz-rs/target/release/pwfuzz-rs -h from our top level to confirm it’s been compiled and works.
This might seem trivial, but consider that we were able to compile a tool without dirtying our host at all. We used Rust as necessary, then removed it when finished. Pretty powerful, if you ask me!
Example 3: Impacket
For our last tool example, we’re going to start transitioning away from crazy long command-line options. Instead, we’re going to use a specification file to build a Docker image that’s useable. In the next chapter, we’ll learn how to make these spec files ourselves, but for now, we can take advantage of the many, many projects that deploy code this way.
This spec is known as a Dockerfile. It contains instructions for how to build a new image from scratch. Think of it as a programmatic way of doing much of what we’ve done already, executing commands in containers, copying data inside, and then using docker container commit to produce a new image.
If all that felt like a lot of effort to build a new image, well, it is! And that’s why Dockerfiles exist. For this one, let’s download the Impacket repo to our server.
Now let’s move into that folder and look around.
cd impacket
ls
We see there’s a Dockerfile in there. Let’s cat that thing out.
FROM python:3.8-alpine as compile
WORKDIR /opt
RUN apk add --no-cache git gcc musl-dev python3-dev libffi-dev openssl-dev cargo
RUN python3 -m pip install virtualenv
RUN virtualenv -p python venv
ENV PATH="/opt/venv/bin:$PATH"
RUN git clone --depth 1 https://github.com/fortra/impacket.git
RUN python3 -m pip install impacket/

FROM python:3.8-alpine
COPY --from=compile /opt/venv /opt/venv
ENV PATH="/opt/venv/bin:$PATH"
ENTRYPOINT ["/bin/sh"]
You don’t need to understand this file right now! We’ll be going over how Dockerfiles work in the next chapter. But even now, I bet you can get a sense of how the image is built. Each line is a layer of change, up to the ENTRYPOINT, which defines what will run when we start the container.
Building the Image
Now, let’s use it to build an image. The core command will be docker image build, but of course there are some options to pass.
For one thing, docker image build needs a build context—basically, where to build from. Usually we run this in the folder with the Dockerfile, so that would just be ..
For another, we need to name this thing! We do that with the -t option, for “tag.” So if wanted a tag other than latest, we’d do name:tag.
All together now, still in the Impacket folder:
docker image build -t impacket .
Down come the dependent layers, after which Docker begins executing the instructions in the Dockerfile, creating our new image layer by layer.
Once all is said at done, docker image ls reveals we have a new impacket image! Not too terrible as a process, mm?
But how to use it?
Running the Container
Let’s start by running a new container from this image.
docker container run -it impacket
We are immediately kicked into a root shell. Nothing looks particularly interesting…until we examine the $PATH environment variable.
echo $PATH
Huh, weird, wonder what’s in that /opt/venv/bin directory?
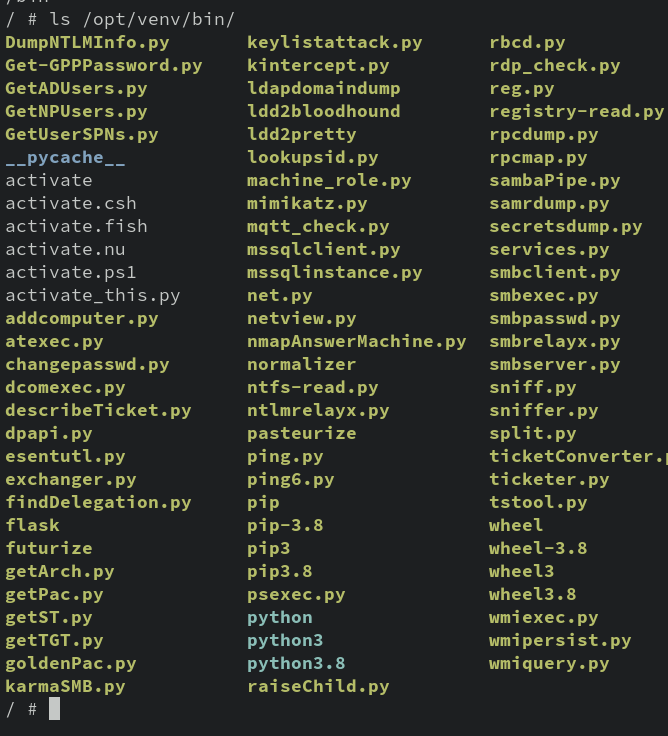
Oh. All the tools. Neat.
Using the Tools
This part is gonna be fun, but take it step-by step.
We’re going to use Docker to run 2 different Impacket tools in two different containers: one will be a SMB server using smbserver.py, and another will use smbclient.py to connect to the first server. One image, two sides of the conversation.
Let’s set up the SMB Server. We need something to server, for starters. Create a new folder—call it whatever you want.
mkdir stuff
And let’s toss some data into that directory. You can use your imagination.
echo "Hello from the SMB Server!" > stuff/hello.txt
We’ll be mounting that directory as a volume inside our server container. We’ll also, for convenience, be forwarding port 445 into the container.
We saw that the Impacket container’s entrypoint was /bin/sh, so that means we’ll want to launch it in interactive mode, with a tty. And we’ll actually launch the server separately, after the container is up.
And here’s a new trick! Instead of relying on Docker’s name for the container, we’re going to explicitly name it with the --name option.
All together now:
docker container run \
-ditp 445:445 \
-v $(pwd)/stuff:/stuff \
--name smb_server \
impacket
docker container ls will show we have a running container with port 445 forwarded, and the appropriate name.
Now we need to start the SMB server in there. This we’ll do with a quick docker container exec invocation.
docker container exec -dit smb_server smbserver.py stuff /stuff
Let’s break that down. We’re running interactively with a terminal (-it) because this command generates output. But we don’t need to attach to it, so we run it detached (-d). The server script is smbserver.py, which is available on our container’s $PATH.
The syntax for smbserver.py takes, at minimum, a share name and a location. Our location will be /stuff, and so our share name can also be, creatively, stuff. So all together:
docker container exec -dit smb_server smbserver.py stuff /stuff
It’s a blind command, but this kicks off the SMB server with our data. Now, we get to access it with smbclient.py.
For this one, we’re going to run a second Impacket container. This one we’ll interact with directly, so just -it, no -d. We also don’t need to forward any ports or mount any volumes. Honestly, pretty easy!
So let’s complicate it a little bit. Because this container is intended to be ephemeral, we don’t need it to stick around as a stopped container after we exit. So we’ll pass the --rm option to delete it immediately after we’re finished.
docker container run -it --rm impacket
we’re once again at a humble sh prompt. Here, we’re going to kick off smbclient.py. The syntax for use in our case is simple: smbclient.py <target_ip>. No username or anything needed for this server.
In my case, and maybe yours, that’ll be:
smbclient.py 10.0.2.4
This is why we forwarded port 445 from the host: to make this part easier!
If all goes according to plan, we’ll be connected to our SMB server. Run shares to see the available shares.
If you see STUFF, then use STUFF to access that share. Then, just like a normal directory, you can ls. hello.txt should be there. Running get hello.txt will download it to the container’s filesystem. exit out of the SMB client to return to the container shell.
Finally, cat hello.txt will reveal the server message.
And that’s it! We’ve successfully used two Impacket tools together, across two separate containers.
Go ahead and exit out of the client container, and use docker container stop smb_server to kill the server. You can then use docker container prune to clean up.
Phew! That was a lot, but now you have a handle on how to use Docker to quickly access tools that are otherwise tough to install.
Check For Understanding
-
What are the advantages and disadvantages to using containers to run certain tools?
-
Find another tool install and run using Docker!
4-1: Dockerfiles
In the last chapter, we used a Dockerfile to build an image for Impacket tools. That was cool, but wouldn’t it be even cooler if we could write our own Dockerfiles to make our images?
That’s what we’re doing now.
Read the Docs!
I’m going to tell you up front that we will not be covering every single instruction you can use in a Dockerfile. I strongly recommend you review the Dockerfile reference and keep it handy as you go through this chapter—and anytime you’re creating a Dockerfile, really.
What Is a Dockerfile?
From one point of view, a Dockerfile is a program. It’s a set of instructions to Docker that tells it how to build an image. Simple enough, right?
Let’s complicate it.
From another point of view, a Dockerfile is a list of changes, which become layers atop the base image. A really cool way to see this is docker image history. Check out the history for one of our Python images.
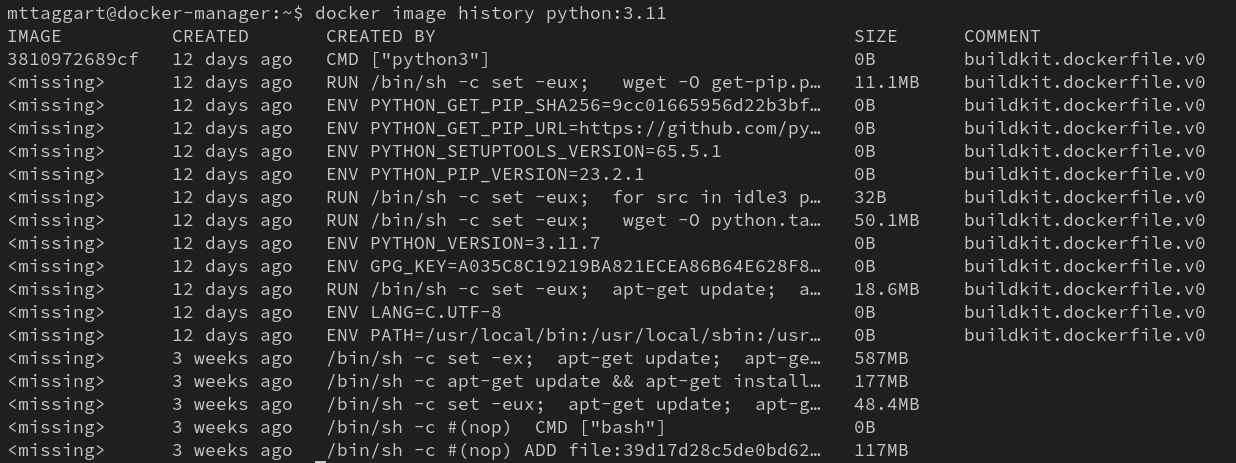
What you’re seeing, in reverse chronological order, is every instruction that went into the Dockerfile to make the image. That’s why the “first” one is the CMD instruction, which determines the default command to execute when the image is run as a container.
Writing the Dockerfile
But we’re getting ahead of ourselves. We’re going to make a new image from a Dockerfile, so let’s get get up. Start by making a new folder called mynodeapp, and moving into it.
mkdir mynodeapp
cd mynodeapp
As the name might suggest, we’re going to be making a tiny NodeJS application. But don’t worry, you don’t need to know any JavaScript to make this happen. That part we’ll handle for you. Download mynodeapp.zip and extract its contents to your mynodeapp folder. You should now have a src folder that contains all the application code you’ll need. No fuss, no muss.
Using any text editor you like, create a new file called, originally, Dockerfile. It’s actually a “magic name” that Docker expects for certain operations.
FROM
The first line of our Dockerfile is the FROM command. This defines the base image on which we’ll build. So yeah, it’s not entirely from scratch, but base images are reasonable starting points.
The Node Image Page shows a ton of tags to choose from. I like to use the latest version with an Alpine flavor. As of this writing, that means the 20-alpine tag. So our instruction is:
FROM node:20-alpine
Don’t worry that we haven’t pulled the image yet; Docker knows what it needs to do during build. We’ll get there.
COPY
At this point, we have a base image with NodeJS installed, but it doesn’t yet have our source code. We need a way of loading it into the container.
“Don’t you mean ‘load it into the image?’”
Yes, but no. Remember that the build process creates a series of containers, the last of which is saved as an image.
The COPY instruction works exactly as you think: COPY <src> <dest>. We can use relative paths, and we can create new directories with dest. Let’s make a directory called ‘/app’ in the container, which will represent what’s in the src.
COPY ./src /app
WORKDIR
With our code copied over to the container, it would be nice if we could cd to the new directory, so subsequent commands don’t all need /app. We can do just that with WORKDIR. All future instructions will execute from that context.
WORKDIR /app
RUN
Node apps usually have dependencies as defined in package.json. Ours has one dependency, but it’s critical. We can install it using npm, the Node Package Manager. It’s available in the container; we just need to invoke it. The RUN instruction runs shell commands in the build container. We’ll run npm i, short for npm install.
RUN npm i
ENV
Our Node application operates as an ad-hoc web server, which means it needs receive requests on a TCP port. We’ve seen how to forward ports to containers with docker container run -p. But which port to forward? A glance at our source code would inform image builders that the default listening port is 8000, but the code also watches for the NODE_ENV environment variable and uses that value instead if set.
We can use the ENV instruction to set default environment variable values. Do not use this for secrets! It’s common for secrets to end up as environment variables when working with containers, but this is not the way to get them there. We’ll discuss secrets management in a later chapter.
ENV uses a key=value syntax.
ENV NODE_PORT=8000
If you really want to test this, make it a different number than the default. Remember that later when we run the container!
EXPOSE
We’ve established our app’s source code can tell us what ports are being used, but we shouldn’t require builders to review source for that information. That’s what EXPOSE is for. it doesn’t actually forward any ports—rather, it’s a kind of annotation embedded in the image’s history that can inform container users what ports they’ll need to forward.
EXPOSE 8000
ENTRYPOINT
Last instruction! We want our app to launch automatically when the container runs. That’s what ENTRYPOINT is for. It tells Docker how to start the container.
Now there is also the CMD instruction, which would appear to do the same thing. What’s the difference? ENTRYPOINT gives us a little more flexibility, because we can use it in conjunction with CMD to provide additional arguments. Also, interestingly, when a user explicitly adds a command to docker container run, it is overriding anything in CMD, but not ENTRYPOINT. That means we can have a base ENTRYPOINT and add more arguments at runtime.
TL;DR, use ENTRYPOINT if you intend for the same command to run every time the container launches.
ENTRYPOINT node ./
Remember we set
WORKDIRto/app, so the./in that command refers to the current directory. Node then searches forindex.jsin that location and executes it.
Full Dockerfile
So, all together, we’ve written:
FROM node:20-alpine
COPY ./src /app
WORKDIR /app
RUN npm i
ENV NODE_PORT=8000
EXPOSE 8000
ENTRYPOINT node ./
This is our complete Dockerfile! Of course, this is by no means the entirety of what we can do with Dockerfile instructions. For example, ADD has some powers COPY does not, such as fetching material from remote Git repos.
I’ll again encourage you to refer to the Dockerfile reference.
Building the image
Time to build! We’ve already seen how docker image build works. Let’s use the image name mynodeapp.
docker image build -t mynodeapp .
Our image should now be available and visible in docker image ls.
Running the Container
At long last, we can run our app container! Please run it detached, or your shell may be forfeit!
docker container run --rm -ditp 8000:8000 mynodeapp:latest
If all has gone according to plan, we should be able to curl localhost:8000 from our host and receive data from our app!
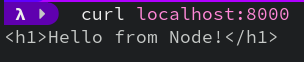
We can also run docker container logs against the running container to see the Listening on $PORT message, confirming the app works.
Modifying NODE_PORT
Before we end, I want to touch on modifying environment variables. Although we defined NODE_PORT in the Dockerfile, environment variables can be overridden with the -e option flag. So if we run:
docker container run --rm -e NODE_PORT=8001 -ditp 8001:8001 mynodeapp:latest
We will now be able to curl localhost:8001, and docker container logs for our new container will show Listening on 8001. The app still works, but on a port of our choosing!
Congratulations on creating your first Docker image! Now that we know how to make them, we need to learn how to publish them. That’s up next.
Check For Understanding
-
What is the difference between
CMDandENTRYPOINT? When would you use each? -
Create a new image from
ubuntuoralpinebase images that runs a custom script when the container launches.
4-2: Registries
“Daddy, where do images come from?”
“Well, when a developer loves a codebase very much…”
Just kidding. They come from image registries. These are web applications that publish repositories of images, submitted by authorized users of the registry.
The best known (and default for Docker) is Docker Hub. This is where all the base images we’ve used so far have come from. But it is by no means the only registry out there. Here are a few others to know about.
Quay
Quay is Red Hat’s proprietary image repository, but many of the images hosted there can be used by the general public. This Ubuntu image, for example, works just fine. Try pulling it down.
docker image pull quay.io/bedrock/ubuntu
Hey, look at that! Our image list now shows quay.io/bedrock/ubuntu, separately from the ubuntu image we pulled previously. And it works just like our others! Try it with docker container run --rm -it quay.io/bedrock/ubuntu /bin/bash.
Yep, just like usual. So what’s up with Quay? Why did Red Hat make their own registry?
We’ll discuss alternative container runtimes a little later in the course, but largely Quay supports Red Hat’s own container-based products, including its enterprise container orchestration product, OpenShift.
GHCR
GitHub maintains its own container registry known as GHCR, or the GitHub Container Registry.
Original, right?
Rather than presenting a specific web portal for the registry, GHCR works as part of GitHub itself, offering a deployment target for GitHub users as part of their project repositories. Published images are available at paths under https://ghcr.io.
But pulling images works the same way, once you have a path to a project’s published image.
Docker Hub
We’ve arrived at the big blue whale, the Ur-registry. Docker Hub was the first major registry around, and continues to be the most commonly used.
It’s also the one that I’d recommend making a free account on. With an account, you are able to upload your own images.
Once you have an account, you can run:
docker login
to authenticate the CLI tool to the Docker Hub. You’ll need your username and password.
You can use
docker loginto auth to other registries as well! You just provide the server name/address afterdocker login.
Host Your Own!
It turns out you can host your own image registry! As you might expect, everything you need exists as a Docker image.
Let’s try running our own registry and pushing the mynodeapp image to it.
Start by pulling down the registry image.
docker image pull registry:2
And now we’ll run it. We’ll run this one semi-permanently, using the --restart policy of always to keep it up and running. We’ll forward port 5000 as well.
docker container run -dp 5000:5000 --name registry --restart always registry:2
Now, in order to “assign” an image to this new registry, we need to retag it so that its name matches the registry. That’s why the image we downloaded from quay.io was tagged quay.io/bedrock/ubuntu. So for our local registry, the mynodeapp image needs to become localhost:5000/mynodeapp. We can use docker image tag to set this label.
docker image tag mynodeapp localhost:5000/mynodeapp
And now, we can publish our image to the new registry!
docker image push localhost:5000/mynodeapp
Once done, we can use the registry’s HTTP API to prove we’ve published it.
curl localhost:5000/v2/_catalog
Hey look! There it is.
We can bring down the registry with docker container stop registry, unless you want to experiment further.
Uh, Why Did We Just Do That?
Running your own image registry is not a required aspect of using containers, but many organizations choose to do so in order to securely distribute containers within their network, but many more simply rely on public registries, paying for accounts to host private images.
And that concludes our brief exploration of registries. I want you to understand the underpinnings of container infrastructure, even if you don’t have to engage with it regularly. The registry system is one such topic.
Check For Understanding
-
Why would you use a different registry besides Docker Hub?
-
Push the
alpineimage to your local registry. Usedocker image tagto push more than one version, then use the HTTP API to list all the versions hosted in your registry.
4-3: Volumes
We’re getting pretty handy with creating containers at this point. We can even make our own images to launch them from—images which include our own application code. The DevOps dream is tantalizingly close. One layer we haven’t discussed much though? Data.
Yes, that pesky little persistence layer that flies in the face of our ephemeral desires. If all our application code is in sacrificial containers, where is our data supposed to live?
We’ve kiiinda already seen the answer—or at least one really good one: Docker volumes. You know, those things we’ve been creating with -v when we add directories or files from our host filesystem into the container? Well it turns out there’s another way to handle persistent data.
docker volume ls
What have we here? Docker volumes are managed storage locations we can attach to containers. They are considered the preferred method of adding persistence to a containerized application.
Creating a Volume
I don’t create volumes manually very often. Instead, they’re created as part of the Docker Compose workflow—but we’ll get there. Let’s go slow and learn how volumes work by making one manually now.
docker volume create myvol
docker volume ls
That ls doesn’t tell us much, does it? Luckily, volumes also have an inspect command. Let’s give it a shot.
docker volume inspect myvol
That’s better. We see a bit of JSON that looks like:
[
  {
    "CreatedAt": "2023-12-22T07:47:00Z",
    "Driver": "local",
    "Labels": null,
    "Mountpoint": "/var/lib/docker/volumes/myvol/_data",
    "Name": "myvol",
    "Options": null,
    "Scope": "local"
  }
]
Most of these fields are self-explanatory, but do notice the Driver. Turns out there are multiple driver options, as we’ll see later. Drivers are how we can use cloud storage and other options for Docker volumes.
We also see the Mountpoint. That location is on your host right now! It’s empty, but it’s there.
Mounting a Volume
Time to start a container with the volume attached so we can add some data!
docker container run -it --rm -v myvol:/myvol ubuntu:latest
We’re using Ubuntu mainly for the comfort of Bash. Notice the -v option. We’re mounting the myvol volume to the path /myvol in the container.
There are two syntaxes for mounting volumes:
-vand--mount. We’ll be using-vhere for simplicity, but go read the docs about the differences.
Once in the container, running ls confirms there’s a myvol directory at the root of the filesystem. Let’s add some data.
echo "I'm from a container!" > myvol/foo.txt
Then exit out of the container. If everything worked, we should have a file at /var/lib/docker/volumes/myvol/_data/foo.txt. You can check with sudo cat.
sudo cat /var/lib/docker/volumes/myvol/_data/foo.txt
And there it is: persistence beyond the life of a container.
Although this seems identical to the mounting we were doing prior, allowing Docker to manage the storage location has some performance benefits. Also, when we move beyond the local driver, the differences fade away.
Let’s run another container, but this time use the mount options to make our volume read-only:
docker container run -it --rm -v myvol:/myvol:ro ubuntu:latest
See that :ro at the end there? It makes all the difference. Try adding content to /myvol now.
Mounting volumes read-only when we don’t need write is a best practice, and a habit to get into. Other options like noexec are worth considering as well.
That concludes our introduction to volumes. In practice, we don’t really create them manually like this, but it’s important to know how they function. The same is true for our next topic: networks.
Check For Understanding
-
What is the difference between a bind mount and a managed volume? When would you use each?
-
Think about backup strategies. How might you ensure that the data from a Docker volume is preserved?
4-4: Networks
When Docker is first installed on a system, the network configuration changes in a way that’s surprising the first time you see it. Run ip a s on your Docker host.
Amongst the network interfaces, you’ll notice docker0. It has an IP address of 172.17.0.1/16. What’s going on here? Let’s try running a container to see what’s going on.
docker container run -dit --rm alpine:latest
Now that it’s running in the background, let’s inspect it using our jq tool again.
docker container inspect <container> | jq '.[] | .NetworkSettings.Networks'
You can of course just run
docker container inspect <container>, but this cuts to the heart of the matter.
We see a bridge network configuration here, with a gateway and IP address in the 172.17.0.0/16 subnet. Sound familiar?
When we stand up a container, by default it is joined via a network bridge to the docker0 interface, and given an IP on that subnet. The gateway, as you see, is that docker0 interface, meaning our host serves as the router (and DNS server, by default) for all Docker containers we start.
Creating Networks
But we don’t have to live with defaults. Let’s create a new network and—just for funsies—let’s make it use a different address space.
docker network create --subnet 10.10.99.0/24 mynet
docker network ls will now show us our new network. Note that the driver defaulted to bridge, which is what we wanted.
Now, let’s start a container that’s attached to our custom network. We do so by passing the --network command line option.
docker container run -dit --rm --network mynet ubuntu:latest
Now when we re-run the docker container inspect command above to see the NetworkSettings, we can see that the Gateway and IP Address are in the subnet we defined for mynet!
Go ahead and bring down that container.
Why Use Multiple Networks?
It seems silly to go to all this trouble. Why bother? Imagine I had a web application made of two services—a web server and a database server. Now, these would be able to communicate with each other on the default bridge network anyhow, but now imagine that I had another application that, for whatever reason, I wanted to share the same database. I need the second app’s web server container to communicate with the original database server, but maybe I don’t want to allow that web server to access everything else on the default bridge network.
A diagram may help.
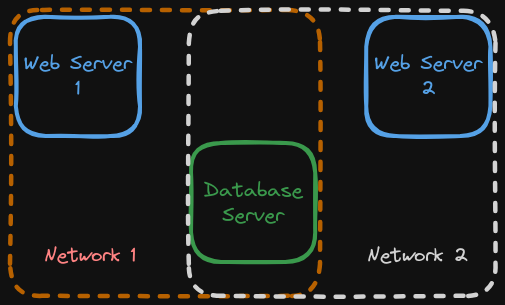
Now, I’ve isolated the web servers from one another. Is it perfect? Certainly not, but I’ve reduced the attack surface of each individual network, and may add additional defenses to the database server, the single pivot point.
Multiple Networks Demo
Let’s create two more networks: net-1 and net-2 for our purposes.
docker network create net-1
docker network create net-2
And now, let’s create some containers—one on each network, to start.
docker container run -dit --name ubuntu-1 --network net-1 ubuntu
docker container run -dit --name ubuntu-2 --network net-2 ubuntu
docker container run -dit --name ubuntu-3 --network net-1 ubuntu
So we’ve created three containers. The first two are attached to their respective networks. The third, for now, is attached to net-1, but that’s honestly just a matter of sequencing. The idea is to connect ubuntu-3 to both network. We can do this with docker network connect.
docker network connect net-2 ubuntu-3
Now, docker container inspect ubuntu-3 | jq '.[] | .NetworkSettings.Networks' will show us two networks for the container. Also notice that Docker intelligently changed the subnets for each, despite us not providing that configuration.
Hostname Resolution
Let’s start a shell in ubuntu-3 to play with our networks.
docker container exec -it ubuntu-3 /bin/bash
In theory, this machine is connected to both networks we created and should be able to contact both ubuntu-1 and ubuntu-2. You might think we should have gone to get the IP addresses of both of those before jumping into this shell. I mean, we could reasonably guess that the addresses are 172.19.0.2 and 172.20.0.2, respectively, but here’s the thing.
We don’t have to. Docker has yet another networking trick up its sleeve: it performs transparent hostname resolution for containers.
Let’s install ping to get started. Yes, these containers are even missing ping.
apt update && apt install -y iputils-ping
Now, we can successfully run:
ping -c 4 ubuntu-1
ping -c 4 ubuntu-2
How about that? The hostnames resolved! This feature becomes critical in heavily interrelated multi-container applications. Think about it: we won’t necessarily know any IPs that services might have to connect to, but we can control hostnames.
Imagine a WordPress application done in Docker. You might have one container for the PHP code/webserver, and a second for the database. The database config then could use a container name as its hostname rather than a clunky IP address.
This is not theoretical; we’re going there next. Let’s stop all our containers and remove all our networks. Here’s a quick way to stop all running containers:
docker container ls | cut -d " " -f 1 | tail -n+2 | xargs docker container stop
Then you can clean up stopped containers and networks with their respective prune commands.
And now, we’re ready to explore how we really build multi-container applications: Docker Compose!
Check For Understanding
- Create a new network using a custom subnet. Attach an existing container to this network.
4-5: Docker Compose
If all this manual typing of docker commands to create containers, volumes, and networks piece-by-piece feels a little laborious and not very “DevOps,” well, you’re right.
In most actual usage, Docker is not used in this way. It’s invaluable for learning the concepts around containers, but to build reproducible containerized applications, we make use of one command above all: docker compose.
How Compose Works
Docker Compose (which used to be a separate docker-compose add-on script), is used with YAML files that contain a specification for an entire application. Every container, volume, and network is defined in a single file. We can then run docker compose up (and a few option flags, of course) to bring up all the necessary resources for our multi-container application.
A Simple Compose File
Let’s create a new folder called composedemo to store our work. Then, with any editor you like, create a new file called docker-compose.yml inside this new folder. The contents should look like this:
version: "3.8"
services:
  webserver:
    image: nginx:latest
    ports:
      - 80:80
Here we’re defining a single “service,” made of an Nginx container that forwards port 80.
We can confirm that the spec is written correctly by running docker compose config in our composedemo directory.
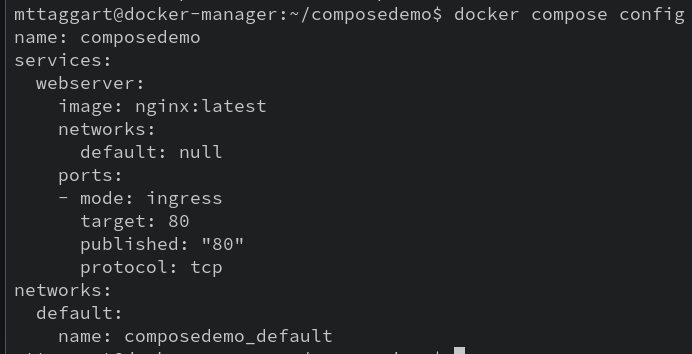
What da—how did it know what to look for!?
Docker looks for files called docker-compose.yml by default, but you can also pass -f with a filename to change that default. Also notice that the name was filled in with the name of the containing directory. This can be customized by passing the -p option, for “project name.”
If there had been an error in our syntax, docker compose config would have reported it. But since it reported the fully fleshed-out spec instead, we know our file is good to go. It’s always a good idea to run config after writing a compose file.
Let’s launch this thing. We can do so with:
docker compose up -d
The -d is for “detached,” making sure we don’t lose our terminal entirely to the container.
We get a fun little animation and then, 2 items are created: a network and a container. The container was expected, but the network may be a bit of a surprise. The network isn’t super helpful for single-container applications, but compose files can contain multiple services. At that point, making an ad-hoc network makes some more sense.
docker container ls confirms that we have a running container with port 80 forwarded. It also has a name like composedemo-webserver-1, meaning we have a predictable container name.
We can stop our application by running docker compose stop. This stops any running containers, but doesn’t remove them. And then of course, docker compose start will bring our services back up.
To fully destroy our application, we use docker compose down.
Just to reiterate, all these commands should be executed within the folder containing the specific docker-compose.yml file related to the app you want to affect.
Building Toward Reality
Obviously we’re not about to deploy Nginx without any actual content served up. So how can we include content in a container using a compose file?
Easy mode is an ad-hoc bind mount, which is similar to using -v with a filesystem directory, as opposed to a defined Docker volume.
version: "3.8"
services:
  webserver:
    image: nginx:latest
    ports:
      - 80:80
    volumes:
      - ./html:/usr/share/nginx/html
We’ve added a volumes key to our webserver service. The syntax for each array element underneath volumes can match what we’ve used on the command line, although it can actually use relative paths. There is also a long-form syntax that’s worth learning as well, because it can be clearer when setting multiple mount options.
To make this work, let’s add a html folder inside of composedemo and add a little web content.
mkdir html
echo '<h1>Hello from Compose!</h1>' > html/index.html
When we run docker compose up -d, our content will be mounted to the default webroot for Nginx. We can test this with curl localhost.
Go ahead and bring the service down again with docker compose down. As we mentioned before, this kind of volume mounting isn’t always the best choice. Instead, we could consider including the code in a new Docker image.
“But then you’d need to pull the image before you use the compose file!”
Not if we built the image in-place. We can provide a build key in our compose file that determines how we build the image that we use for the base of our containers. Of course, we will still require a Dockerfile, but we know how to do that now.
Let’s create a new Dockerfile in composedemo. Something a little like:
FROM nginx:latest

COPY ./html /usr/share/nginx/html
And let’s modify our docker-compose.yml so that our image is custom, and we include the build context of our local directory. And since we’re copying the code directly to the image, we do away with the volume entirely.
version: "3.8"
services:
  webserver:
    image: composedemo:latest
    build: ./
    ports:
      - 80:80
A new run of docker compose up will build the image, sure, but if you want to do that as a separate step, docker compose build will build all the required images for the application.
Then, docker compose up will bring up our application, with custom-built image.
Now that we have the basics down, let’s start to build a more realistic application. How about a WordPress blog that runs in containers?
Errata
Please note that in modern versions of the Compose File spec, the version key is not required.
Check For Understanding
-
Why is a Compose file preferable to a one-liner
dockercommand? Think about the entire product lifecycle. -
While referencing the Compose file specification, create a new application that uses a custom network.
4-6: WordPress via Docker Compose
Creating a WordPress blog in containers has a lot to recommend it: easy updates of code, isolation of dependencies, and some light sandboxing of an app this is, shall we say, “renowned” for its appeal with criminals for exploitation. All while persisting the blog’s data in external, managed volumes.
What would comprise a Dockerized WordPress app? We’d need:
- PHP-enabled webserver
- WordPress code
- Database server
That seems like 3 containers, but in reality, the WordPress code and webserver are the same thing, so this is a simple 2-container application. Both WordPress and MySQL have Docker images ready to go. I encourage you to review the various tags for each, as well as the intro documentation on their pages.
Services
The WordPress image has several variations. To keep things simple, we’ll use the apache variant with the latest PHP version. As of this writing, that would be php8.2-apache.
version: "3.8"
services:
  web:
    image: wordpress:php8.2-apache
For MySQL, we can just use the latest tag. We’ll call that the db service.
version: "3.8"
services:
  web:
    image: wordpress:php8.2-apache
  db:
    image: mysql:latest
Environment Variables
A quick glance at the main pages for either image will tell you that defining the images isn’t going to be sufficient. Each of them relies on specific environment variables to function.
We briefly touched on environment variables while exploring Dockerfiles. The concept is similar here, except that we have two options to define them: as list with =, or proper key-value pairs.
environment:
  - FOO=bar

# or
environment:
  FOO: bar
Either works, but I prefer to use YAML as it’s intended wherever possible.
For WordPress, we at least need the following variables set:
WORDPRESS_DB_HOSTWORDPRESS_DB_USERWORDPRESS_DB_PASSWORDWORDPRESS_DB_NAME
For MySQL, a complementary set is required:
MYSQL_ROOT_PASSWORDMYSQL_DATABASEMYSQL_USERMYSQL_PASSWORD
We’ll define these in each service’s respective environment object.
NOTE: What we’re about to do is not a security best practice. I know that, you know that. But this is a starting point.
version: "3.8"
services:
  web:
    image: wordpress:php8.2-apache
    environment:
      WORDPRESS_DB_HOST: db
      WORDPRESS_DB_NAME: wordpress
      WORDPRESS_DB_USER: wp_user
      WORDPRESS_DB_PASSWORD: w0rdpr3s$
  db:
    image: mysql:latest
    environment:
      MYSQL_ROOT_PASSWORD: wordpressr00t
      MYSQL_DATABASE: wordpress
      MYSQL_USER: wp_user
      MYSQL_PASSWORD: w0rdpres$
Let me reiterate that this is not the way to do this in production, but it will do to get us started. We’ll examine better secrets management in a later chapter.
Volumes
If we want our WordPress app’s data to survive restarts, or if we want our containers to be truly ephemeral, then the webroot containing our site config (as well as any plugins/customizations) have to exist independently of the container. That means volumes.
We could do bind mounts, but in this case, managed volumes is a much cleaner approach. In the compose file, this requires two references to the volumes we’re creating: one underneath the service itself, defining how the volume is mounted; and another in a top-level key, defining the volume.
Much like on the command line, there’s a short form and long form of the mounting syntax. Short is, well, really. short:
version: "3.8"
services:
  web:
    image: wordpress:php8.2-apache
    environment:
      WORDPRESS_DB_HOST: db
      WORDPRESS_DB_NAME: wordpress
      WORDPRESS_DB_USER: wp_user
      WORDPRESS_DB_PASSWORD: w0rdpr3ss
    volumes:
      - wordpress_content:/var/www/html
  db:
    image: mysql:latest
    environment:
      MYSQL_ROOT_PASSWORD: wordpressr00t
      MYSQL_DATABASE: wordpress
      MYSQL_USER: wp_user
      MYSQL_PASSWORD: w0rdpr3ss
    volumes:
      - wordpress_data:/var/lib/mysql

volumes:
  wordpress_content:
  wordpress_data:
Notice that the list items under each service are strings with a colon in them, not actually key-value pairs. You can also see that the volumes section has two keys—one for each volume—but nothing beneath them. That’s because we’re using the default driver and options for the volume.
Just to show you the long form, here’s what the MySQL volume would look like using that syntax:
db:
  #...
  volumes:
    - type: volume
      source: wordpress_data
      target: /var/lib/mysql
Additional Settings
Port Mappings
We’re almost done, but we have two more important items to add. For the web service, we need to expose some ports. Since we’re not setting up HTTPS, we’ll just do 80:80 for now.
Port mappings are list items, so:
web:
  # ...
  ports:
    - 80:80
Dependencies
While we’re on the web service, let’s discuss a sequencing issue. We actually need the db service to be up and running in order for the WordPress container to work at all. We can add the depends_on key to explicitly state that the db service must be up first. All we have to do is name the required service in a list item.
web:
  # ...
  depends_on:
    - db
Restart Policy
Let’s make sure this thing starts up again after a reboot. This is a web server, after all! We have four options for restart policies:
noalwayson-failureunless-stopped
I think unless-stopped works for our purposes—it allows us to manually stop the containers, but otherwise Docker will kick them off.
web:
  # ...
  restart: unless-stopped
db:
  # ...
  restart: unless-stopped
Okay, that was the last piece. Let’s put it all together!
version: "3.8"
services:
  web:
    image: wordpress:php8.2-apache
    environment:
      WORDPRESS_DB_HOST: db
      WORDPRESS_DB_NAME: wordpress
      WORDPRESS_DB_USER: wp_user
      WORDPRESS_DB_PASSWORD: w0rdpr3ss
    volumes:
      - wordpress_content:/var/www/html
    ports:
      - 80:80
    depends_on:
      - db
    restart: unless-stopped
  db:
    image: mysql:latest
    environment:
      MYSQL_ROOT_PASSWORD: wordpressr00t
      MYSQL_DATABASE: wordpress
      MYSQL_USER: wp_user
      MYSQL_PASSWORD: w0rdpr3ss
    volumes:
      - wordpress_data:/var/lib/mysql
    restart: unless-stopped

volumes:
  wordpress_content:
  wordpress_data:
Once that’s copied into our docker-compose.yml, we can run docker compose config to make sure it looks good, and then:
docker compose up -d
Once everything pulls and launches, you should have two containers, a new network, and two new volumes.

Our webserver is up! How to access it? Remember that we forwarded port 8888 on our host to port 80 on the VM for exactly this reason. So on your VM host, visiting http://localhost:8888 should bring up a WordPress installation page!
If you see “Error establishing a database connection” instead, check all your environment variables for consistency. This is the most common reason for failure. Also, give it a minute or two—the database can sometimes take a moment to create.
Once you walk through the install process, you’ll have a containerized WordPress blog to explore! That wasn’t too bad, right?
We’ve gone all the way from docker container run hello-world to a compose file that deploys a proper application.
Still miles to go though. When you’re ready, bring the app down with docker compose down. If you want to fully destroy the app, use docker compose down -v to remove the volumes.
Next, we’re going to finally use that second VM! It’s time to enter…Swarm Mode.
Check For Understanding
- What would upgrading the WordPress app look like in a Docker app like this? What about upgrading PHP?
5-1: Swarm Setup
Still got both VMs running? Still got the worker’s IP address in the NAT Network? Great. We’re going to need to access the “Worker” VM shortly.
First, let’s talk about what’s about to happen, and why.
We’ve already seen that compose files are great at creating applications of multiple containers. But let’s ask the most annoying question in tech:
“Does it scale?”
How will our little WordPress app respond when it’s being hammered by thousands of visitors an hour? What happens if one of the containers crashes? Can we build the app in such a way that it is more resilient? And what if we want to make that resilience elastic? Can we scale up and down as needed?
All these questions and more have led to the category of tools known as container orchestration. They exist to manage the deployment, replication, and scaling of containerized applications. You have probably heard of the most commonly used orchestration system: Kubernetes. Kubernetes (often shortened to k8s because DevOps craves efficiency) is a profoundly powerful tool. It is also notoriously complex. It’s…a lot. Often, it’s more than we need for early orchestration. And luckily, there’s another, simpler tool closer to hand: Docker Swarm.
Put simply, Swarm mode allows us to join multiple Docker hosts together to share resources. It also unlocks some new capabilities, like specifying how many replicas of a container in a service we want to deploy. Lastly, it unlocks the Secrets Manager, which allows us to securely store and use sensitive data in our containers.
How Swarm Works
Docker swarms are made of one or more nodes: Docker hosts that can communicate with each other via the Docker HTTP API. In every swarm, there is at least one manager node, and zero or more worker nodes. Managers are where services and stacks (more on those later) are deployed and controlled from. They are also the nodes that maintain the state of the cluster and schedule container jobs in the node.
Do we need a diagram? Here’s a diagram.
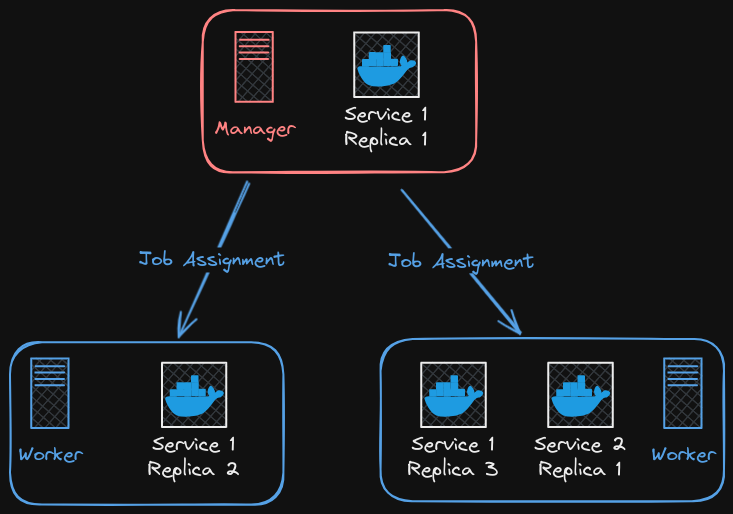
The Manager can run containers, but also handles job assignments for worker nodes. Here we have 2 services: one with 3 replica containers, and one with just a single replica. The load is balanced across the nodes, unless otherwise specified. All of the service containers are linked via an overlay network that spans nodes and allows communication between container (unless specifically disabled).
One other cool thing the manager does: ingress load balancing! For any service that exposes a port, that port will be exposed by the manager, and ingress to replicas will be rotated amongst the replicas. That port can also be exposed to upstream load balancers.
Creating the Swarm
Let’s activate Swarm Mode! On our original manager VM, run:
docker swarm init --advertise-addr 10.0.2.x
Replace the IP address with the internal IP of your own manager node.
You’ll be given a Swarm initialized message, and a very long command to join other nodes to the swarm. A couple things to note: that token is retrievable at any time with docker swarm join-token worker. There’s also a manager option for joining new manager nodes. We won’t be doing that for this course. Also, observe the port at the end of the command. That’s the default API port that all nodes must be able to communicate over. Be aware of this if you deploy a swarm in an environment with more strict access rules, or between network zones.
Copy that very long command. Still have that worker IP? Let’s one-line it with SSH.
ssh user@worker.ip docker swarm join --token <your-join-token> manager.ip:2377
We’re taking that whole join command and putting it after the SSH connection syntax. In case you’re unfamiliar, you can pass SSH specific commands to run instead of the default shell. So here we’ll just pass the join command without having to open and exit a remote session. Success looks like:
This node joined a swarm as a worker.
And that’s it! We’re in Swarm mode. In our next chapter, we’ll start exploring our newly-unlocked command line powers.
Check For Understanding
-
Explain why Swarm might be beneficial for deploying an application. What use cases don’t make sense for Swarm?
-
Use the
docker swarmcommand to make the worker node leave the Swarm, then re-join it.
5-2: Swarm CLI
Swarm mode comes with some new CLI commands to create and interact with these new, multi-node structures. For this chapter, we’ll focus on services. Services are sets of containers, one or more replicas, all running from the same image.
Replicas can be distributed amongst swarm nodes, so no one node has to do all the work of running a service. The manager, which is where we create the service, will handle the scheduling of containers on nodes based on availability.
Let’s make one with the CLI and see how it works.
Services
Just like before, we’ll start with trusty ol’ Nginx.
Unless otherwise specified, every command from here on out happens on the manager node.
docker service create --name web -p 80:80 nginx

We’ll get back messages that tell us that 1/1 containers are running and that the service is “converged,” meaning all required updates have been made. Now of course if we curl localhost, we’ll see the default Nginx page.
docker container ls will show us one container running, but pay close attention: there’s no port forwarding listed! PORTS shows 80/tcp, but no arrow for forwarding.
That’s because the forwarding is not for the container, but for the service. Let’s compare that to docker service ls.
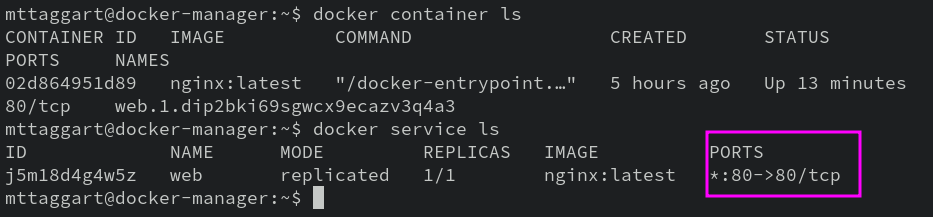
See? The service we created has the port forwarded. This is how replication will function.
Before we move on to replication though, let’s mess with this container a little bit. Make a new file called replica.html, and put something fun in there.
echo "<h1>I'm the first replica</h1>" > replica.html
docker container cp replica.html <web_container>:/usr/share/nginx/html/index.html
Now of course, curl localhost shows our modified file.
Time to replicate!
Stargate SG-1 fans just got a shiver down their spine.
Update
When we ran docker service create, we could have provided the --replicas option to specify how many replicas of the container we wanted for the service. No worries though; we can dynamically scale the service with docker service update. Simply provide the new options and the service name, and you’re off!
docker service update --replicas 3 web
Now our service is converged, let’s re-run docker service ls. We see 3/3 replicas. Cool!
Run curl localhost a few times. Do you get the same result every time?

If this is your first contact with load balanced, replicated services, this might be kinda freaky. What’s happening here?
The service load balancer is routing you to different containers based on availability and, frankly, whose turn it is.
Let’s run docker container ls again. If you only see one container, guess where the others are?
SSH into the worker node from the manager node. Run docker container ls there.
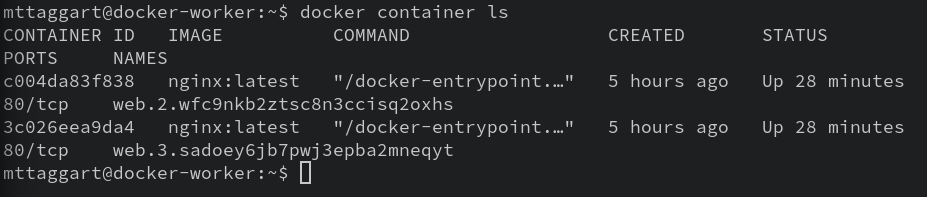
Ah, there they are! The manager assigned the other 2 containers to the worker node. The reason we don’t see them cleanly with docker service ls is that it shouldn’t matter which container is where for most cases. But because we manually modified one of them, there’s a discrepancy in some of the requests to the service.
This is, as you might imagine, not the best way to deploy replicas. There’s a much easier way to dynamically add material to our replicas, which we’ll cover in the next chapter.
Rollback
But for now, let’s get rid of those extra containers. We can revert our service to its last good configuration with docker service rollback. Be aware tough, that this command works sort of like the “Back” button on your remote. Once you run rollback once, running it again will effectively revert to the change you just rolled back from! Put another way, it can only go back one change.
Let’s do it though. Make sure to get back to your manager node!
docker service rollback web
docker service ls will confirm we’re back to one replica.
And to completely blow this thing away:
docker service rm web
It’s worth looking at all the options available in docker service create --help, just to get a sense of what kinds of customizations are possible. But manually creating a gigantic one-liner isn’t very DevOps (unless you’re a k8s admin!). Instead, let’s use a little YAML to declare our services in what we call a Stack.
Check For Understanding
-
If all Swarm nodes need direct access to an image, how would you handle distributing custom images?
-
Create a service from the
alpine:bashimage. Then, using thedocker container commitmethod, update the image. Force an update of the service.
5-3: Stacks
We’ve seen that when we add replication to containers, they become known as “services.” Similarly, when we add Swarm mode to compose files, we refer to them as stacks.
What’s the difference? In Swarm mode, and deployed with docker stack deploy, our compose file apps gain replication powers, as well as dynamic updates! This is, in my opinion, Docker at its absolute best. It’s how I deploy my own apps, and I really enjoy the workflow.
Let’s start with a quick orientation to the docker stack subcommand. Run docker stack --help to see what’s available.
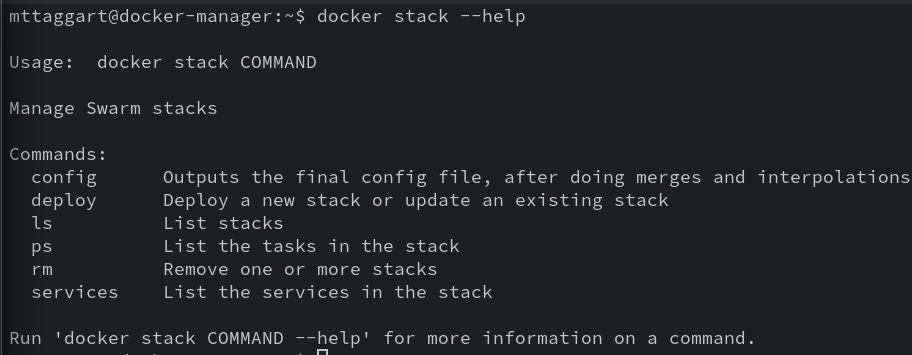
Actually a short list, right? The config subcommand works almost identically to the one from docker compose to confirm our file syntax and show the intended changes for the deployment.
deploy, y’know…deploys. It uses a compose file to do most of its work. so that’s where we’ll focus next.
A Stack Compose File
Let’s start simple, by composifying (that’s a word, promise) our replicated Nginx app.
Make a new directory on the manager called stackdemo, inside of which, make a new docker-compose.yml.
Here’s what goes in it:
version: "3.8"
services:
  web:
    image: nginx:latest
    deploy:
      replicas: 3
    ports:
      - 80:80
This should all look pretty familiar, right? The only new component is the deploy key, which is where we put all the stack-specific configuration.
docker stack config -c docker-compose.yml confirms our file looks good.
And then, docker stack deploy -c docker-compose.yml mystack fires it off! Note that in the case of stacks, the app name is provided explicitly.
The Stack CLI
Now that our stack is up, we can observe it with some CLI tools. docker stack services mystack will show us the service state for all services associated with our stack. And yes, there can be more than one service per stack! We’ll see that shortly.
Going deeper, we can use the docker stack ps mystack command to see the individual containers that make up the stack’s services, including the node on which they’re running. This same information is available via docker service ps <service_name>, but only for one service at a time.
Updating Stacks
You might have noticed that docker stack deploy’s help said it was used to deploy or update a stack. This means the compose file defines the desired state of our stack. To make changes, we make changes in the compose file, then re-run docker stack deploy. By tying our state to a file that can be checked into source control, we now have a way to cleanly manage our infrastructure
as
code
Now we’re really DevOpsing!
Let’s modify our compose file.
version: "3.8"
services:
  web:
    image: nginx:latest
    deploy:
      replicas: 4
    ports:
      - 80:80
  db:
    image: mysql:latest
    deploy:
      replicas: 2
    environment:
      MYSQL_ROOT_PASSWORD: this_is_my_root_password
    volumes:
      - db_data:/var/lib/mysql

volumes:
  db_data:
Again, pretty familiar! We’ve updated the web service to 4 replicas. We’ve also added a db service with 2 MySQL replicas, and a volume to store the data.
If something about this feels off…hang on.
With these changes, let’s re-run our deploy command.
docker stack deploy -c docker-compose.yml mystack
You’ll get just a little bit of feedback that the mystack_web service is updated, and mystack_db is created. No mention of the volume, but docker volume ls sure shows it.
And now, when we run docker stack ps mystack, we’ll see 6 containers: 4 for the web service, and 2 for the db service.

About Volumes
For the db service, we defined a volume. docker volume ls on the manager node will reveal a mystack_db_data volume. So let’s try an experiment.
First, determine which of the mystack_db containers is running on the manager node. With that name or id in hand, run:
docker container exec -it <container_id> mysql -u root -p
Enter the password from our compose file. Once in the mysql prompt, we’re simply going to create a new database called mystack.
CREATE DATABASE mystack;
SHOW DATABASES;
EXIT;
Remember that we’re storing our database information in that volume.
Now, SSH over to the worker node. Using the MySQL container that’s running on that node, again enter the mysql prompt. Once inside, run:
SHOW DATABASES;
EXIT;
What da—where’d our mystack database go?!
Right, so here’s the gotcha with distributed containers that rely on shared data: local volumes will result in a different volume of the same name on each node. They aren’t writing to the same database file! Replication of containers does not unify storage—at least not when using the default local driver.
So how do you make this happen? In the case of MySQL, you can (and should) set up proper replication of the database across your multiple volumes. This guide can get you started, but that’s outside the scope of this course.
For any other replicated containers that must share a single volume, like for instance a website that uses an S3 bucket for static data, you’ll be exploring the REX-Ray plugin, which adds additional drivers and support to Docker to enable connecting to multiple storage types, including Ceph as well as popular cloud storage options.
“Does anyone actually use this?”
Honestly these days, I’m not really certain how common third party volume drivers are. They can be handy for certain use cases, but they introduce a ton of complexity. For containers that need the same data across replicas, I recommend trying to find a way to add that data to the base image.
Besides, there are other ways to connect to services like S3 buckets if we need to. Of course, for that we’d need to provide credentials to the container.
If only there were a way to securely send credentials to a container.
Oh wait—Docker Secrets exists! Let’s move on to them.
Make sure to docker stack rm mystack before kicking anything else off.
Check For Understanding
-
What is the difference between a service and a stack?
-
Reference the Stack documentation. How can we specify on which nodes to place replicas?
5-4: Secrets
How To Get Secrets Wrong
We’ve already seen some extremely bad ideas when it comes to secrets management in our containers—plain-text passwords as environment variables are a huge no-no for proper security. That problem becomes a thousand times worse when the secrets are added to source control. When we are deploying infrastructure as code, it is vital that we protect the secrets our deployments use. Unfortunately, it’s extremely easy to get this wrong, or to cut corners to get things working. It’s much more difficult to do it correctly.
Don’t believe me? Have a look at this GitHub Code Search. Yeah, some of those are examples, but not all of them! That’s public code with secrets exposed.
Our objective is to not be like these repos. Secrets need to be kept secret until they are used in the running container; our declarative configuration should not provide them in cleartext.
Docker Secrets is one way we can make this happen. Given that capability, it might seem weird that it’s only available in Swarm mode. I kind of agree, but as we’ll see, secrets are propagated across the swarm via the Docker API, so there’s some reasoning behind that separation.
Okay, enough theory. Let’s make some secrets.
Making Secrets
We know now that we should kick off our exploration of a new subcommand with --help, and docker secrets is no exception.
docker secret --help
Short list! create, inspect, ls, and rm. Let’s start at the top.
docker secret create --help
This help line might be a little odd to read. The create subcommand takes a name for a secret, and either a file or standard input. I think that’s to discourage using cleartext secrets in creation commands—but we’re gonna do it anyway.
echo "SuperSecretPassword" | docker secret create mysecret -
You’ll get an id back, the universal Docker confirmation that a thing happened. docker secret ls will show a new entry!
What it won’t show is the secret in cleartext. Nor will docker secret inspect mysecret. You’ll get some metadata about the secret, but that’s it. Once created, Docker will never show your secrets outside of a container.
Reading Secrets
So how do secrets get used, anyhow? Turns out, very similarly to volumes. They are mounted inside containers—but not just any containers. As part of Swarm, Docker containers must be part of a service to use secrets. Let’s make a quick service right now.
docker service create --name secretservice -dt --secret mysecret ubuntu
Why no
-i? How would we interact with it? What if we created a service with multiple replicas of a container; how would we choose which one received our interaction?
Run docker service ps secretservice to find where the Ubuntu container ended up, and on that swarm node, use the container’s ID to run:
docker container exec -it <container_id> /bin/bash
And once inside the container, take a look at the /var/run/secrets directory.
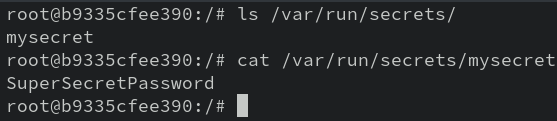
Hi there! And as you can see by cating the file, it’s just a cleartext version of the secret.
And that’s…kinda it. If you can read it as a file, you can use it as a secret.
Feel free to exit our container and bring everything down.
docker service rm secretservice
docker secret rm mysecret
And…that’s kinda it for secrets. Simple, but elegant.
One of my favorite use cases for Docker secrets is managing TLS certificates.
I’m not gonna go make you buy a domain name to demo this, but here’s the basic idea:
- A server on the internet that can obtain a LetsEncrypt certificate
- A Swarm manager that makes Docker secrets out of the obtained certificate(s)
- Certificates passed into Nginx containers as secrets
Why is this cool? Because now we’ve decoupled the image from the certificate, allowing both to be updated independently. And, y’know, not putting private keys in images. It also means that every replica can get the certificate, regardless of what node it’s on.
Secrets are an important component in the secure usage of Docker, but certainly not the whole story. In the next Unit, we’re going to cover security best practices for our containerized applications.
Check For Understanding
-
Explain why environment variables are an insecure way of providing secrets to containers.
-
Create a new image from
alpine:bashthat mounts secrets inside, and, usingcurl, sends them all to a listening server. Maybe you can usenetcaton the host! This one takes some creativity, but I bet you can figure it out.
6-1: Users
Has it bothered you at all that for every container we’ve run, we’ve been root? In like every other context on Linux, we’re told to limit our usage of the max-privilege user. Why is this suddenly okay in containers?
You might think “Oh well, since containers are a sandbox, there’s no risk from running as root.” But you’d be wrong.
Say it with me: containers are not a security barrier.
Once more, with line formatting and emoji:
📦 Containers

  ❗ Are Not

    🛡️ A Security

      🧱 Barrier
The real reason we’ve been using root in all these containers is, well, it’s easier.
That doesn’t make it safe though. We’ve actually set up our Docker host perfectly to explain why. Give this a try:
docker container run --rm -it -v /:/host alpine:bash
Remember that custom Alpine image we made? Time to put it to use! Okay, what did we just do? We launched a throwaway container with the root of the host filesystem mounted at /host in the container.
Wait…is it possible? Could it be?
Yes
We have essentially rooted the host! I can even view /etc/shadow on the host from within the container.
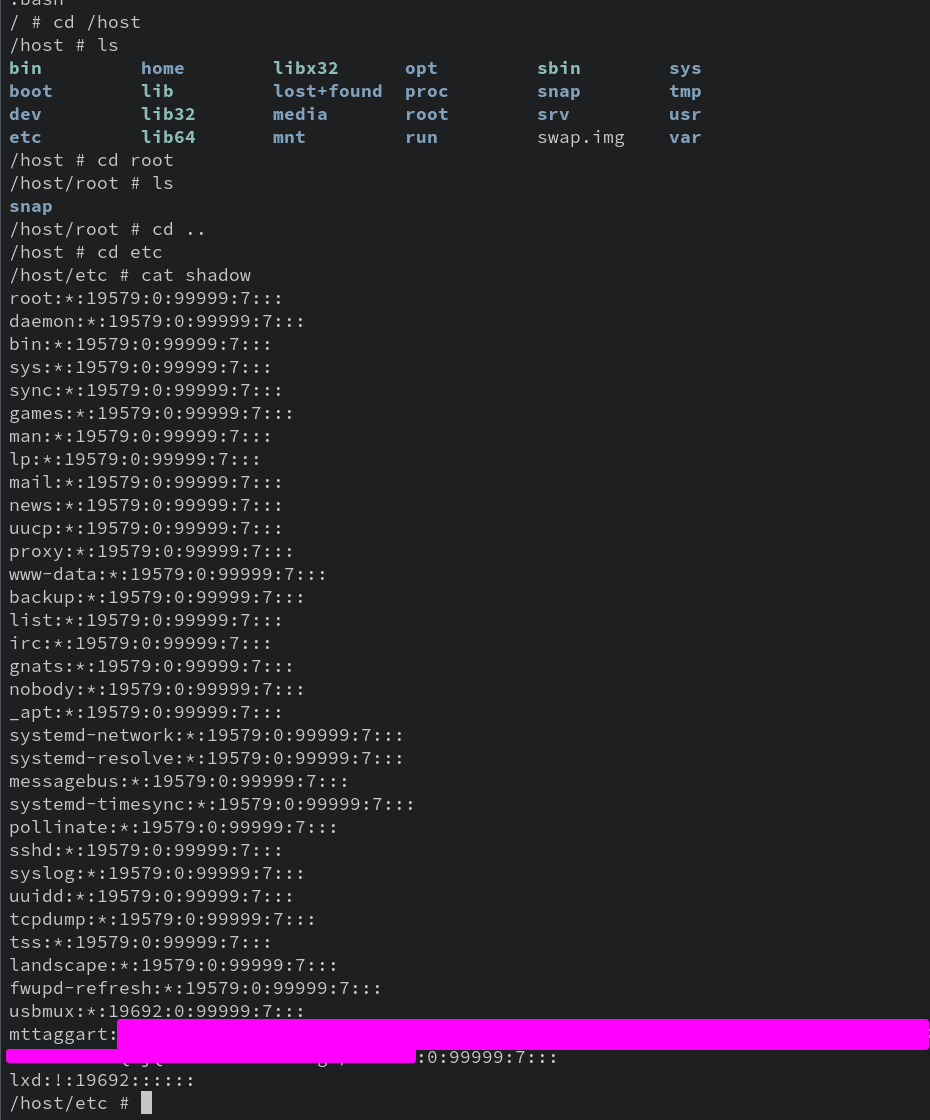
How is this possible?! Think about how Linux permissions work. They’re attached to users based on…username? No, each user has an id number, right? And what is root’s ID number?
I bet it’s starting to click. Yeah, on both the host and the container (and everywhere else), root is user ID 0. So if we mount a drive with no other instructions, the container will honor permissions on the host. You can confirm this further by looking at the owner of your home folder. Within the container, it’ll show an owner/group of something like 1000.
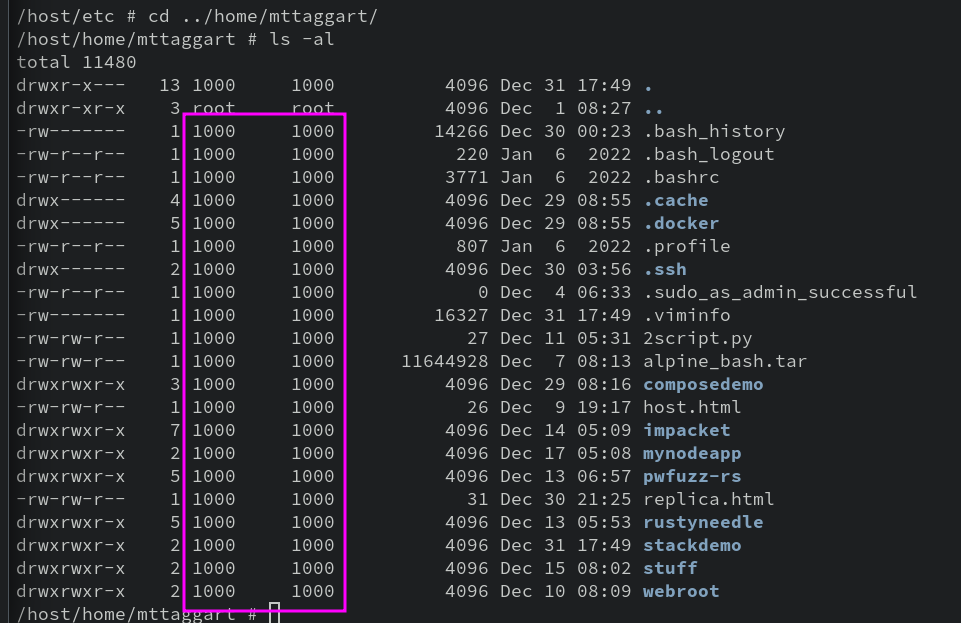
See, the container doesn’t know who user 1000 is, but it doesn’t have to, because the permissions are in fact based on user id! The name is filled in by tools like ls later.
Obviously, this is a security nightmare, but it would be pretty weird to have an entire filesystem mounted inside a container. But maybe a directory or two, not so crazy.
This issue cuts from two directions: inside the container and outside. From within the container, we’d be worried about container escape or unintended access. From outside the container, this capability represents a one-move privilege escalation vector for any attacker that has gotten a user shell on the system.
Well, kinda. Remember that the reason any of our docker container run commands work without requiring sudo is that we added our user to the docker group when we set up the machine. And this is why it’s such a terribad idea in production.
Running as a Different User
Let’s see about mitigating this disaster. Docker does give us some options (besides not removing the sudo safety). For one, we can run containers as a different user. The --user command line option allows us to specify a username or uid (and group/gid if desired). But there’s a catch: the container needs to know the user, or things get weird.
Try rerunning our Alpine container (exit out if you haven’t already), but this time, with the --user option, and your username on the Docker host. Here’s mine:
docker container run --rm -it --user mttaggart -v /:/host alpine:bash
You should get an error from Docker that says there’s no such user in the image. Which is true! No such user in /etc/passwd in the Alpine image.
But what if we use the user ID?
docker container run --rm -it --user 1000 -v /:/host alpine:bash
Hey now, that works! We don’t have a home directory or anything, but the container runs.
One thing though: run id:
uid=1000 gid=0(root) groups=0(root)
So while we’re not root, we’re still in the root group, which is less than ideal. Best to be explicit about that.
Exit out of the container and we’ll try one more time.
docker container run --rm -it --user 1000:1000 -v /:/host alpine:bash
id should look correct now. So we’re user 1000, whoever that is. If we try now to cat /host/etc/shadow, we’ll see that we’ve lost the privilege. Progress! But now, how does this fake user 1000 interact with files owned by the real user 1000 on the host? Navigate to your home folder to find out.
cd /host/home/<username>
Running ls -al in here confirms that uid 1000 has write permissions to this directory. So can we make a file?
echo "I'm from a container!" > uid1000.txt
Making the file seems to work. Let’s exit out of the container and see how it looks on the outside.

Well well well. The file has become the proper user’s.
This is just the beginning of user management in Docker, and frankly a pretty cludgy method. For one thing, we can’t guarantee that every system will have a uid of 1000. And we also shouldn’t be relying on the host’s users anyway. Instead we need a way of making a new, non-root user inside the container. For that, we need a Dockerfile.
Creating Users in Images
The USER command in Dockerfile syntax directs the build to run as a given username/uid. But in order to use that, we have to make a user the hard way.
Make a new directory on your Docker host called userdemo. Then move inside of it, and create the following Dockerfile:
FROM alpine:bash
RUN adduser -h /home/notroot -D -s /bin/bash notroot
WORKDIR /home/notroot
USER notroot
ENTRYPOINT /bin/bash
What’s up with that adduser command? First, it specifies a home directory of /home/notroot. Then, we bypass creating a password for this account (no need for one). Then we specify the shell as bash, which we have in this version of Alpine—the one we already made.
We set our working directory to the new user’s home folder, and then switch to our new user. When bash launches in this container, it’ll be as notroot in that home directory.
Build the image with:
docker image build -t alpine:notroot .
And run it.
docker container run -it alpine:notroot
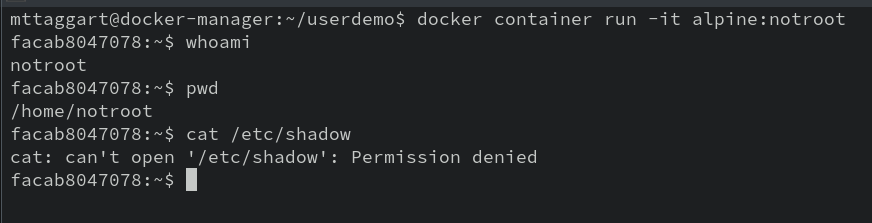
Looks like things are a lot more secure! Using this method, we can create images to run applications as a specific user, rather than running everything as root. The Splunk images do a great job of this, for example. But we could also imagine a web application running as an application user, mitigating the impact of any remote code execution vulnerabilities in the application.
Rootless Mode
If you really wanna guarantee that Docker containers run, and can only run, with limited permissions, you can enable Rootless Mode. Because it’s sort of destructive, we’ll leave this as an exercise for the reader. But the purpose of rootless mode is to guarantee that no elevated host privileges are conferred to containers. The containers themselves may still run as user id 0, but they won’t be able to pull off that same host escape/privilege escalation that we did before.
Rootless mode is a lot, but if you’re seeking to maximize the security of your container runtime despite the significant limitations, it’s worth at least checking out.
This is a solid start to hardening Docker, but there’s much more we can do. Next, we’ll explore how to explicitly define capabilities for our containers.
Check For Understanding
-
Explain why
rooton the container is equivalent torooton the host. And then, how can we translate other existing host user permissions to the container? -
Create a new
nginximage that runs aswww-dataon the container. Hint: you’ll likely have to create a new user and change the ownership of some directories.
6-2: Capabilities
Root and not-root. Pretty binary distinction, wouldn’t you say? It seems silly to require access to the highest-privilege user on the system to perform every sensitive operation. A little more granularity would go a long way.
Good news—it exists, and has for some time. Welcome to Linux capabilities.
I usually bristle at being sent to the Linux man pages, but in this case, man capabilities has the best explanation as to what they are and how they work. Open that up and have it handy while we go through this next section.
Linux breaks down the categories of sensitive operations performed by root into these permissions sets, or “capabilities.” They can be assigned or denied on a per-thread basis.
“Per thread” means that even in a single process, it could be that one thread has the ability to do something that another thread doesn’t. Fortunately, we can also assign capabilities a bit more broadly, such as to binaries. In containerland, we can go a step further and select just the capabilities we want for the entire container.
For Docker, the --cap-drop and --cap-add options work for both single containers and replicated services. Similar directives exist for compose files.
Playing with Capabilities
Let’s try some experiments to understand the impact of capabilities. We’ll start with a bog-standard ubuntu container. But we’ll strip it of all capabilities.
docker container run -it --rm --cap-drop all ubuntu
Now suppose I want to install a package here, like Vim.
apt update
apt install -y vim
record_scratch.wav
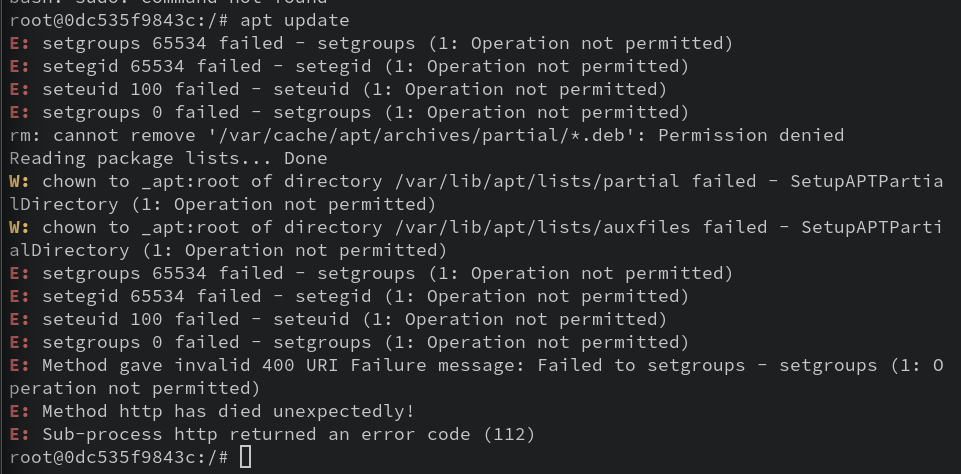
What da—what happened?! By removing all capabilities, we lost the ability to set groups and effective gid/uid, as well as chown. That’s right: even as root, we were unable to perform the update!
Ladies and gentlemen, the power of capabilities! Let’s exit out and try again with the appropriate capabilities added back in.
Warning: you are about to understand why almost nobody does this.
In order to update the package repos and install Vim, we’ll need the following capabilities:
CAP_SETUID: The update process sets the uid manuallyCAP_SETGID: Likewise for the gidCAP_DAC_OVERRIDE: This capability is required to remove filesCAP_CHOWN: To change file ownersCAP_FOWNER: Necessary forchmodto make files executable
So to add all those back in, we’ll need a --cap-add for each one. Like so:
docker container run -it --rm --cap-drop all --cap-add CAP_SETGID --cap-add CAP_SETUID --cap-add CAP_DAC_OVERRIDE --cap-add CAP_CHOWN --cap-add CAP_FOWNER ubuntu
Yikes, right? And that’s just to make sure apt update and apt install work!
Capabilities are both powerful and hard to work with. For example, how clear is it that CAP_DAC_OVERRIDE is required for removing files? To be honest, I only learned it through trial and error. So unless you know your capabilities cold, and have a comprehensive understanding of what your application needs to do, another approach is to remove the gnarliest capabilities.
Remember that security must always balance with usability. The most “secure” server is one that is off and disconnected from all networks, but that’s not much of a server, is it? The reality of application and system architecture involves mitigating risk, not always removing it outright.
So let’s say an attacker does gain command execution on our container. What will they want to do with it? Persistence in containers is less intereesting, since they’re likely to be short-lived footholds. Instead, the attacker will be looking for data exfiltration opportunities from any app within or connected to the container, or to pivot from the container to the host. In both cases, a little network enumeration is in order.
But what if we can confound those efforts?
Removing Capabilities
This time, let’s try removing just one capability: CAP_NET_RAW. This prevents the use of certain kinds of sockets (but not all).
For this exercise, we’ll use Docker Compose and a Dockerfile. It’s the whole shebang!
Make a new folder called nocapraw. Inside, we’ll start with a Dockerfile.
FROM ubuntu:latest
RUN apt update && apt install -y iputils-ping
ENTRYPOINT /bin/bash
And the compose file (docker-compose.yml):
version: "3.8"
services:
  nocapraw:
    image: nocapraw
    build:
      context: .
    cap_drop:
      - NET_RAW
In this folder, we can kick off an interactive version of this service with docker compose run nocapraw.
This is the only way to get an interactive version of a Compose file service. It’s not supposed to work from
compose uporstack deploy.
Once the image is finished building, you should see a root shell inside the container.
Alright, we went to all that trouble to install ping. Let’s ping a thing!
(Sorry, my daughter’s starting Dr. Seuss.)
ping -c 4 google.com
Sad trombone. We can’t! By removing CAP_NET_RAW, we’ve prevented the ping command from opening a raw socket. This might seem like small potatoes, but consider an attacker that somehow gained code execution on the container. and now are looking to pivot from the container to the host. Ping is now unavailable to them! For what it’s worth, neither is nmap, even if they manage to install it or gain access to it. It’s not a perfect defense, but it demonstrates how even a single dropped capability makes he application environment that much more hostile to potential attackers.
Capabilities in Production
So how do you really use (or not use) capabilities in production? Trial and error, honestly. Start by removing every capability from your running app container, and seeing what fails. Bit by bit, add back in only what’s necessary.
Oh, and pro-tip: this works even better with a non-root user in the container, so you already have the advantage of those restricted permissions. No installing apps, for one.
Capabilities are complex, and therefore often overlooked as a security measure. I encourage you to explore them, if for no other reason than to better understand their implementation on all Linux systems. But when properly deployed, they can be an effective part of a hardening strategy.
The next hardening strategy might not feel very security-oriented, but trust me: the security of your wallet might count on it.
Check For Understanding
- What capability would be required to run
netcaton port 80?
6-3: Resources
So you’re running a WordPress site using Docker Compose on top of a modestly-provisioned virtual machine. And then: the most predictable compromise on earth happens—a plugin you were using leads to a site takeover! But these criminals aren’t interested in ransomware or extortion. Nah, instead they just want your CPU cycles.
They use their remote code execution to install XMRig and mine cryptocurrency at your expense. And over time, it’s no small expense! The compute bill balloons before you notice something’s up.
Okay obviously in this scenario, you should have some limits on costs in cloud environments, as well as budget alerts. Still, it’d be nice if our infrastructure itself had our back, right?
Docker’s got you, fam. In both CLI usage and compose files, we can define maximum and minimum available CPU shares and memory for a given container or replica.
The F Bomb
To easily demo this one, we’re going to need a little more than a single terminal window. On the host, let’s install TMux so we can have multiple terminal windows at once—yes, even on a GUI-less server.
sudo apt install -y tmux
Run tmux to to kick off our terminal multiplexer. Then Ctrl+B followed by " to split the window horizontally. We can then use Ctrl+B, up and Ctrl+B, down to switch between panes.
In our top pane, we’re gonna kick off htop to monitor our system’s resource usage.
Note the CPU and memory graphs in the top left.
Now, in the bottom pane, let’s kick off a lightweight container.
docker container run --rm --name forky -it alpine:bash /bin/bash
And now, in this container, we’re gonna do something extremely stupid: intentionally forkbomb ourselves.
DO NOT DO THIS on a system you need to stay up. It should be okay in the VM, but if you’re not following instructions and doing this course on your own machine, this will bring it down. Don’t.
:(){ :|:& };:
Watch those little bars jump! Yeah we’re intentionally maxing the CPU and memory usage of the system to simulate high compute use.
Exit htop on the top window (Ctrl+B, Up to get back to it) and then stop the container.
docker container stop forky
Now re-run htop. All better!
What exactly did we accomplish? We proved that at the moment, a Docker container can utilize the entirety of its hosts resources. That can be good or bad, depending on our needs, but if we’re concerned at all about compromises leading to use of compute, it is definitely bad news.
Setting Boundaries
Let’s try this again, but this time, with some safeties. We’ll cap it to 50% of one CPU, and only 256MB of the 2GB of memory allocated to our host. For docker container run, that means using the --cpus or -c option with a float between 0 and the maximum cores available. And -m or --memory to specify the maximum memory allocation—in bytes, or using standard notation such as 256M.
So all together, here’s our second attempt at this:
docker container run --rm --name forky -it --cpus 0.5 -m 256M alpine:bash /bin/bash
Run the forkbomb again. What happens?
Before we know it, we’re kicked back out of the container. If we’re very quick, we’ll notice a blip on htop.
What?! Did it work? One way to check is to consult the kernel event buffer with dmesg.
sudo dmesg | grep oom
That’s just to help filter the noise. We’ll see an event like this:

“OOM” stands for Out Of Memory. Because we hit our resource constraints, the Linux kernel murdalized the offending process!
If you scroll through the whole dmesg output, you’ll see an entry like this near the previous one:

A new term has entered the chat! What is a cgroup? When we set memory/CPU limits, we in effect created a Control Group for the container that allowed the kernel to set the CPU/memory limits. That’s not a Docker features; that’s a Linux kernel feature that the container runtime takes advantage of.
While it’s not awesome that the container died, it’s better than unrestricted use of resources.
Go ahead and kill Tmux, unless you like it? Ctrl+B, d will detach from the TMux session.
Resource Constraints in Compose
docker service create --help hints at more robust resource control options. --limit-cpu and --limit-memory are the equivalent to the -c and -m options we used for docker container run. Now while those options cap the resource usage, we also have options to guarantee minimum available resources. The --reserve-cpu and --reserve-memory options set a “floor” for resources available to the replicas in the service. That’s right, remember we’re in swarm territory, so the limits and reservations will apply to the node on which the container is deployed.
And of course, there’s a compose file version of these commands. They live inside the deploy key, like so:
services:
  forky:
  # ---
    deploy:
      resources:
        limits:
          cpus: 0.50
          memory: 256M
        reservations:
          cpus: 0.25
          memory: 128M
This spec guarantees at least a quarter of one CPU and 128 megabytes will be available for our service.
Our final security chapter is going to depart from configuration and focus on static scanning of our images. That’s right: actual vulnerability management!
Check for Understanding
-
What is the difference between a CPU limit and a CPU reservation?
-
Experiment with how low you can go! What’s the minimum amount of memory required to run an
ubuntucontainer?
6-4: Static Analysis
We’re concluding this unit with a brief discussion of vulnerability management, and the concept of “shifting left.” If you haven’t heard this term before, I envy you. What a great life you’ve led, full of wise choices.
If we imagine the software development process as a timeline that begins with developers creating the product and ends with engineers deploying and maintaining it, “shifting left” refers to introducing security considerations earlier in the process—toward developers, where issue can be addressed before they ship.
Leaving aside the fact that we simply need to do so much better when it comes to teaching secure coding practices, one area this approach makes sense is vulnerability management. Very little software exists in a vacuum—dependencies may have vulnerabilities that end up included in our application without us knowing it. That’s true for any software project, but it’s especially true for containerized apps, where not only do we need to consider direct library dependencies, but any operating system components included in the image.
That’s where static analysis comes in. By performing, essentially, a vulnerability assessment of our image—including base images as well as our own additions—we are able to catch vulnerabilities before they become risk vectors in production.
In this chapter, we’ll explore a couple of options for image scanning, and discuss how these might be integrated into a deployment pipeline.
Docker Scout
We’ll start with the first party tool. Docker Scout is both a CLI tool and a dashboard available through Docker Hub. The dashboard service offers automated scanning of newly-pushed images, as well as ongoing monitoring. Like Docker Hub itself, Scout’s dashboard has a freemium model: only 3 images that you push to your Docker Hub account may be scanned for free.
But the CLI is just free! And since this course is not actually a Docker shill, we’re going to focus on the CLi component.
Installing Docker Scout CLI
Luckily, installing the Scout CLI is a simple enough—just a curl to bash pipeline. Don’t worry; I’m sure there script is safe!
curl -sSfL https://raw.githubusercontent.com/docker/scout-cli/main/install.sh | sh -s --
This will add a subcommand to Docker—you guessed it: docker scout! There are a number of sub-sub commands to explore, but we’ll start with cves. We care about vulnerabilities, after all. This command takes an image and returns a report of all known vulnerabilities in the image by CVE number.
Running Docker Scout
Let’s test this out on one of the images we’ve used. WordPress might be fun.
docker scout cves wordpress:php8.2-apache -o wordpress-vulns.txt
We’re using the -o option to write to a file because the output is going to be rather long, so it’s easier to read it with a text editor, or less.
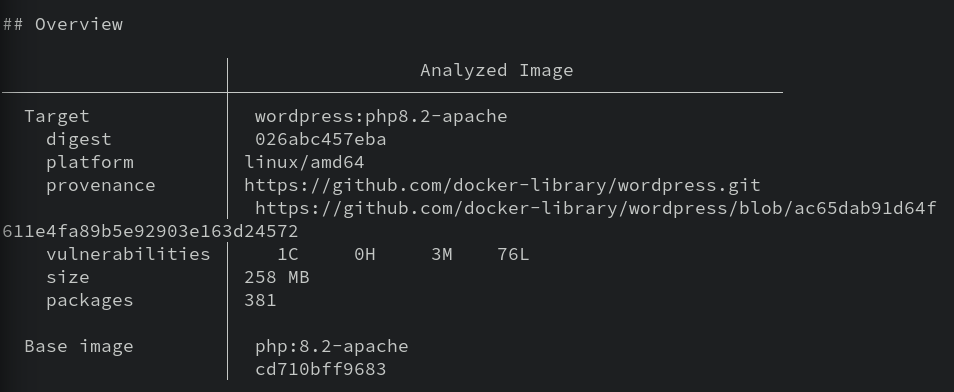
Like I said, the report is long. But within it, you’ll find a list of CVEs that Scout detects in the image and its packages. At the very bottom of the report is a summary of findings. I have:
80 vulnerabilities found in 30 packages
  LOW       76
  MEDIUM    3
  HIGH      0
  CRITICAL  1
Knowing that, I might search the text for CRITICAL to find that Crit.
That kinda sucks though, right? Luckily, docker scout has a --format option, which a few potential values. I personally like the SARIF format, which is JSON. Let’s rerun the command to produce SARIF output.
docker scout cves --format sarif wordpress:php8.2-apache -o wordpress_vulns.json
It’s still a giant file. But it’s a giant JSON file, which means our old pal jq can help us out. I won’t make you figure out a useful query from scratch. Here’s a starter that provides CVE, the severity, and a text description:
cat wordpress_vulns.json | jq '.runs[0].tool.driver.rules| .[] | {id, "severity": .properties.tags[0], "text": .help.text}'
This is much cleaner, no? And if you really wanted to, you could add | select(.severity == "CRITICAL") to get just the Crits.
If it’s seeming at this point like
jqis a powerful tool with an awful syntax…yeah. It is exactly that.
These CVEs are useful, but neither contextualized, nor paired with remediation steps. Another option, if we’re looking for action items, is docker scout recommendations. In the case of wordpress:php8.2-apache, we’ll learn there’s a new version of the image! Easy enough to do something about that.
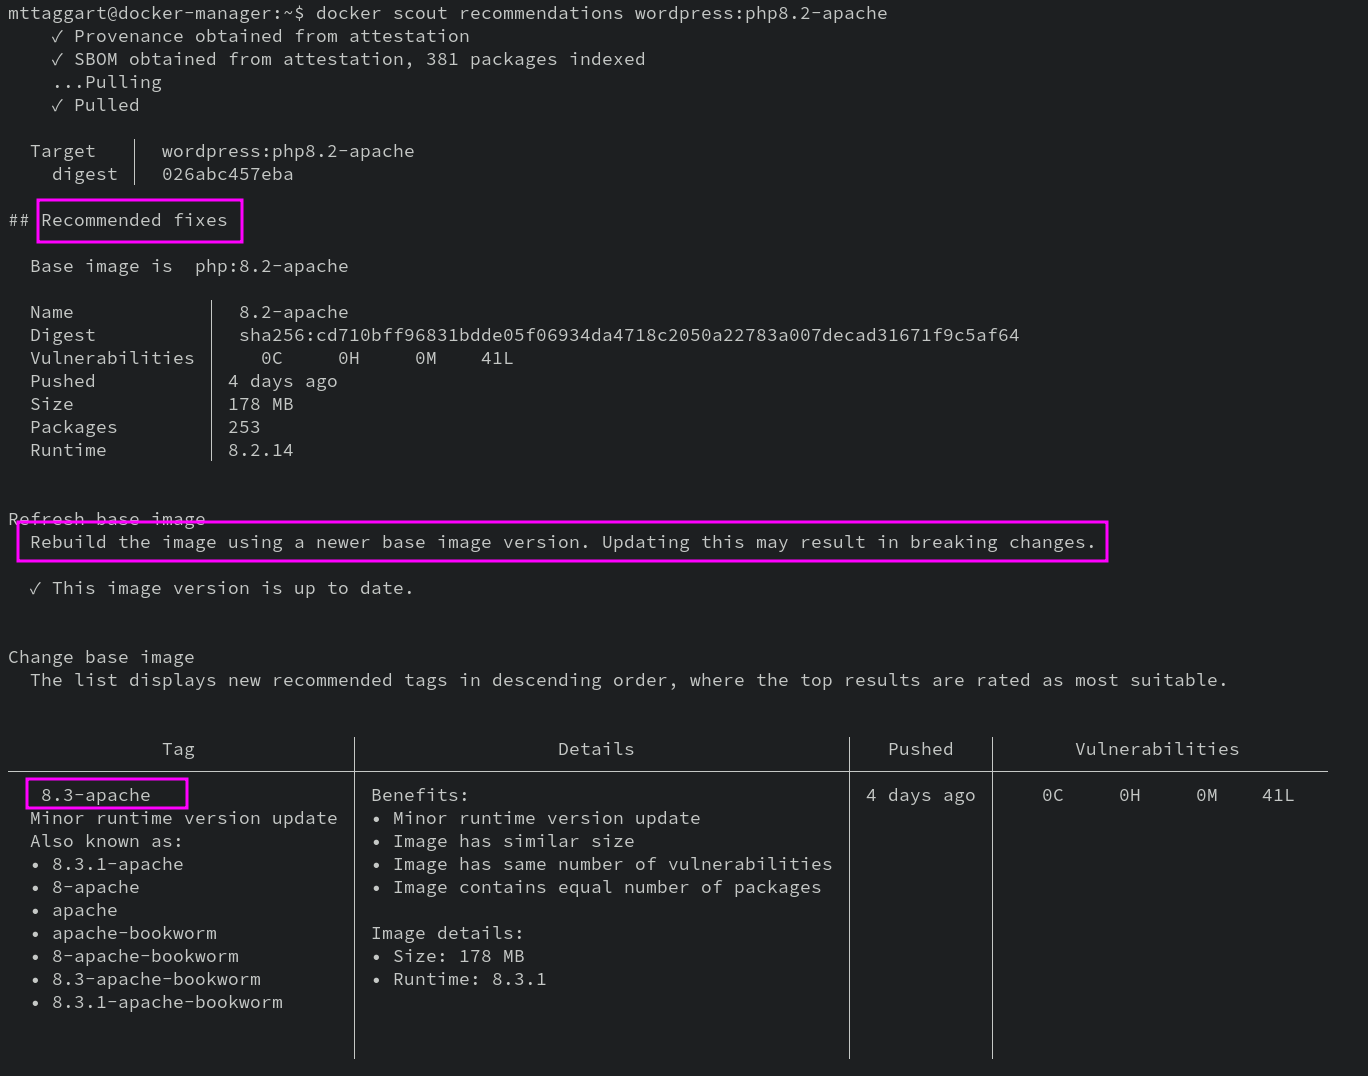
Now that’s the first party tool, which as I mentioned is kiiinda designed to loop you into their premium services. And that’s okay, honestly! Their premium services are nice, and I’ve paid for them personally with no complaints.
But!
They shouldn’t be the only option.
Good news: they aren’t.
Trivy
Scanning container images is one of the many capabilities of Trivy, an incredible scanning tool from Aqua Security. It goes far beyond CVEs and looks for, per their README:
- OS packages and software dependencies in use (SBOM)
- Known vulnerabilities (CVEs)
- IaC issues and misconfigurations
- Sensitive information and secrets
- Software licenses
And…it’s entirely open source.
Installing Trivy
Couldn’t be easier! They make a .deb available on their releases page. Make sure you’re at the latest release, then find the 64-bit .deb file. In your VM, run:
wget https://github.com/aquasecurity/trivy/releases/download/v0.48.3/trivy_0.48.3_Linux-64bit.deb -O trivy.deb
sudo dpkg -i trivy.deb
trivy --version
Using Trivy
Now that we have this thing installed, what the heck do we do with it? As you might have guessed trivy --help will provide us with subcommands, one of which is image.
If you use any of the other resources scanned by Trivy, Don’t move on from this chapter without trying those subcommands! It’s really quite an impressive bit of kit.
Let’s give it a try on the same image we used Scout on.
trivy image -o trivy_wordpress.txt wordpress:php8.2-apache
As before, we’re writing to a file because the default table format is large and messy. Opening it up, we see the summary up top, rather than at the bottom. That’s convenient! Here’s what I got as of this writing:
wordpress:php8.2-apache (debian 12.4)
=====================================
Total: 509 (UNKNOWN: 1, LOW: 332, MEDIUM: 123, HIGH: 50, CRITICAL: 3)
Now wait a tick. That’s not what Scout found.
80 vulnerabilities found in 30 packages
  LOW       76
  MEDIUM    3
  HIGH      0
  CRITICAL  1
So Trivy is finding a lot more. This has to do with how it’s examining the image—not just the base OS, but software dependencies as well.
Trivy also has --formatoptions worth reviewing, including json and --sarif. The SARIF output matches the structure of Docker Scout’s but there are some different tags. A jq query to match the Scout query would look like:
cat trivy_wordpress.json | jq '.runs[0].tool.driver.rules| .[] | {id, "severity": .properties.tags[2], "text": .fullDescription.text} | select (.severity == "CRITICAL")'
Notice the tags[2] to grab the third tag rather than the first, and the use of fullDescription instead of help. Some, but not all, of these descriptions, will involve remediation recommendations. Unfortunately, there is no equivalent to docker scout recommendations for Trivy. You’re on your own there.
Plenty of other commercial or freemium scanning solutions exists, like Snyk or JFrog XRay. The tool chosen is less important than the process. The idea here is to introduce vulnerability scanning into the containerization pipeline so what known vulnerabilities can be remediated before shipping. It may seem dull, but between preventive scanning and having to handle an exploited vulnerability in your deployed containers, the boring process solution is always the right call.
Check For Understanding
-
Explain why it’s valuable for developers to own a part of the security assessment process.
-
Use
trivywith--format sarifandjqto find all Critical vulnerabilities in the latestnodejsimage.
7-1: Podman
Many chapters ago now, we mentioned that Docker was just one implementations of an open standard. But if you don’t really have options when it comes to container runtimes, who cares who open the standard is?
Suppose that, for whatever reason, you wanted to use a container runtime besides Docker. You still wanted to deploy containers, but Docker’s way of doing things wasn’t to your liking. What could you do about that?
But good news fam: you do have options. There are several alternative container runtimes around. The one we’ll focus on is Podman
What?!
Okay fair question. What are we dealing with here, and why should we care? Their own documentation explains it this way:
Podman is a daemonless, open source, Linux native tool designed to make it easy to find, run, build, share and deploy applications using Open Containers Initiative (OCI) Containers and Container Images. Podman provides a command line interface (CLI) familiar to anyone who has used the Docker Container Engine. Most users can simply alias Docker to Podman (
alias docker=podman) without any problems. Similar to other common Container Engines (Docker, CRI-O, containerd), Podman relies on an OCI compliant Container Runtime (runc, crun, runv, etc) to interface with the operating system and create the running containers. This makes the running containers created by Podman nearly indistinguishable from those created by any other common container engine.
So basically, Podman seeks to be a drop-in alternative to Docker. Neat, right? But whyyyyyy would you bother?
The primary advantages to Podman are the following:
-
Daemonless: no long-running service requiring root privileges and a potentially-compromisable socket giving up control of all your containers.
-
Easy rootless mode, because of the daemonless design.
-
It’s not from the evil corporate Docker.
That last one isn’t a technical advantage, and yet strangely the one I hear discussed most often. Go figure.
TL;DR: want containers without all the Docker overhead? Podman is your buddy. And the extra good news? Almost all of the commands are interchangeable. In fact, it’s common practice, as that quote suggests, to alias docker to podman to avoid confusion.
Let’s try it out!
Installing Podman
Installing Podman is shockingly simple.
sudo apt install -y podman
Yep, really.
Using Podman
You already know how to use Podman because you know how to use Docker! We’ll leave off the alias for now, but try this new runtime on for size.
podman image ls
Yep, seems to work—but this is a different collection of images from Docker’s, so we won’t see any of the ones we previously downloaded. Oh, and another catch: when we go to pull, we’ll need the full URL to the image, including the repo. No defaulting to Docker Hub anymore. To pull Docker images then, we’ll prepend the image name and tag with docker.io:
podman image pull docker.io/alpine:latest
Aaaand we’re off to the races. The rest works as you’d expect.
Podman Limitations
So what can’t this snappy little container runtime do? For one thing, Swarm mode. Say goodbye to your use of services, and there’s no such thing as podman stack. There’s a reason for that, but for now, Podman is best used on single hosts, and for development or small deployments.
Podman also can’t really do Docker compose files. There is such a thing as podman-compose, but it’s just a wrapper for the Docker implementation. Again, this is not really what Podman is for. It’s meant for small container use cases, or in conjunction with some more powerful tools.
Building Images
This isn’t really a Podman thing specifically, but if we don’t have Docker, how are we supposed to built images? Do we…use Dockerfiles?
You can! podman image build will accept Dockerfiles. But also, Podman plays well with Buildah, an alternative image builder that does not require Docker at all! We won’t go into detail on Buildah, but it’s a fascinating way of thinking about building images. In some ways, it’s much less “magical” than Docker in how it approaches the build. Worth exploring, anyhow.
That about does it for Podman. It’s entirely optional, but you should know there are alternatives to Docker, should you need/want them.
Almost done! In our next and final chapter of material, we’ll talk about that many-headed beast lurking in all conversations about containers: Kubernetes.
Check For Understanding
-
Why is “daemonless” design considered more secure?
-
Use Podman to recreate some of our exercises in 4-3 and 4-4. Also try some secrets, like in 5-4. What works? What doesn’t? Does this seem like a viable replacement?
7-2: Kubernetes
It’s pronounced “KOO-ber-net-eez.” Just so we have that out of the way.
Hang around the container conversation—or really, any tech social media—for long enough, and you’re bound to start hearing about Kubernetes, sometimes abbreviated to K8s. But unless you’re in this space, it can be a little tricky to understand what it does, or why it seems like everyone is talking about it.
Kubernetes is an open source tool for container orchestration. In that way, it is similar to Docker Swarm, but K8s goes a fair ways beyond Swarm in terms of capability (and complexity).
Generally speaking, K8s is designed to deploy, update, rollback, and scale multi-container applications. It does this complete with load balancing, failure recovery, cloud native storage handling, and more. It’s…a lot. But its power can’t be ignored.
And, for what its worth, Kubernetes engineers are in high demand. As are security professionals who actually understand how containers and K8s work. Amazing hackers like Ian Coldwater have carved out quite a niche by specializing in this field.
Learning K8s
Knowing that Kubernetes exists and what it does is essential, but using K8s is not. Consequently, we will not be deploying Minikube here or performing any of the other myriad learning activities available for this tool. I do however want to point you in the right direction, should you choose to explore K8s.
Unsurprisingly, the best place to start is on K8s’s own documentation. I’d review the Concepts first, then head back to Getting Started to walk through the creation of the learning environment. It is possible to use your VMs that you set up for this course to explore K8s—minikube specifically.
“Do I Need Kubernetes?”
The answer to this question is almost always “No.” As the documentation advertises, K8s is for “planet scale.” You are not Google. You are not Microsoft. You’re not even Twilio. Your little web app with a database layer and an API can do just fine without the technical debt of Kubernetes.
All too often, new developers believe they need to build their application with the idea that it must be ready for Google-scale from day 1. That simply isn’t the case, and often introduces more complexity—that is, points of failure—to the system. Even with containers, the advice to start with the simplest working version and increase complexity as needed remains true.
So you start with Docker on a single host. Or Podman. You deploy a single app, maybe with Docker Compose. Then you discover the need for multiple services, replicated across regions. Time for Docker Swarm. And then, finally, you find the need for robust load balancing, updating, and more. That’s when it’s time to explore Kubernetes.
Unless you’re just endlessly curious, in which case: have fun!
That, my friends, is it. We’ve reached the end of the instructional material for this course. All that remains is to discuss your Exhibition of Mastery. Well done making it this far!
8-1: Exhibition of Mastery
Congratulations on making it all the way through this course material. Sticking with a self-directed course is no simple task, but you’ve demonstrated the drive and discipline to succeed—well done.
Or you just skipped to the end, but who would do that??
Courses at TTI conclude with an Exhibition of Mastery. This is an opportunity for you to create something new that demonstrates to yourself and others what you’ve learned. These are not graded or “turned in.” Creating them and sharing them is entirely up to you. If you want feedback on what you create, you are more than welcome to do so in our community.
Exhibition Rubric
What kind of a thing should you make? I can’t fully answer that question, but I have a funny feeling it should involve containers.
In all seriousness, the baseline for demonstrating that you have mastered this material requires a running Docker application with the following characteristics:
- Exposes a network port
- Consists of multiple linked containers
- Has at least one service that is >1 replicas
- Runs a container based on a custom image
- That custom image is built with a Dockerfile
- The application is defined by a Compose file
- One of the containers must run as a user other than root
- One of the containers must have CPU/Memory limits
If you can deploy such an application, you will have demonstrated mastery of this material.
I wish you good luck, and I thank you for going on this learning journey.
- Michael Taggart