3-2: Containers
We've already gotten a start on containers, but there's a lot more to running containers. For starters, we need to do a bit of cleanup. From our early experiments, we have several stopped or exited containers kicking around. While these don't take up a lot of space, normally (they can though!), they can add up. We can remove old containers with docker container prune.
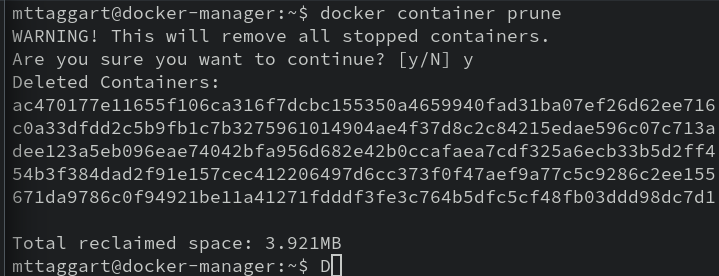
See? Not a lot of space reclaimed, but maintaining a clean working environment is a good habit to get into.
For this lesson, we'll need the nginx:latest image. Go ahead and pull it down now.
docker image pull nginx
The Nginx image is a solid starting point for our exploration. It's Debian-based, so we have a familiar package manager available, but also: the way we use the container relies on several common, important techniques.
Attached/Detached
But before we jump into Nginx, there's more to do with Alpine—I promise, it's related. We've seen that if we run docker container run -it alpine, we get a shell, because we've launched the container in interactive mode, and allocated a pty. But what if we wanted the container to launch, but do so in the background so we could use it later?
That's possible with the -d option, for "detached." Go ahead and try it.
docker container run -dit alpine
Yes, you can chain option flags. And also yes, we still need the
-iand-tflags.
What you get back, instead of a shell, is the id of the now running container. Check it out with docker container ls. Hey look! An Alpine image is running. Notice the COMMAND column show /bin/sh.
We launched the container in detached mode. We can, as you might imagine, attach to the running command.
docker container attach <container_id or container_name>
There's our container shell!. Run hostname to confirm you're in the Alpine container.
Now we run exit to leave the container. But wait—docker container ls now shows no containers!
When we ran exit on the running command—in this case, the shell we attached to—the container stopped because its running command stopped.
This is hardly ideal. We need a way to execute commands within the container without killing it on exit!
Exec
There is a way: docker container exec. This command will run a separate command from within the container. We can run single commands simply enough. Let's try it with:
docker container run -dit alpine
docker container exec <alpine_id> hostname

Notice I used just a small snippet of the ID? Yeah you can do that, or the goofy container name Docker creates.
Now if we want a shell, we have to reintroduce -it to the mix, because of course this command is interactive and requires a pty. Let's try this one.
docker container exec -it <alpine_id> /bin/sh
And now we have a shell again! But this time, exiting won't kill the container, because this is not the main process! Run exit and then docker container ls to confirm that the container persists.
Now that we know how to attach, detach, and exec, we can move on to some more interesting containers. Feel free to shut down the Alpine container with docker container stop <container_id>.
Nginx
We downloaded Nginx for a reason. Let's start using this thing!
docker container run -d nginx
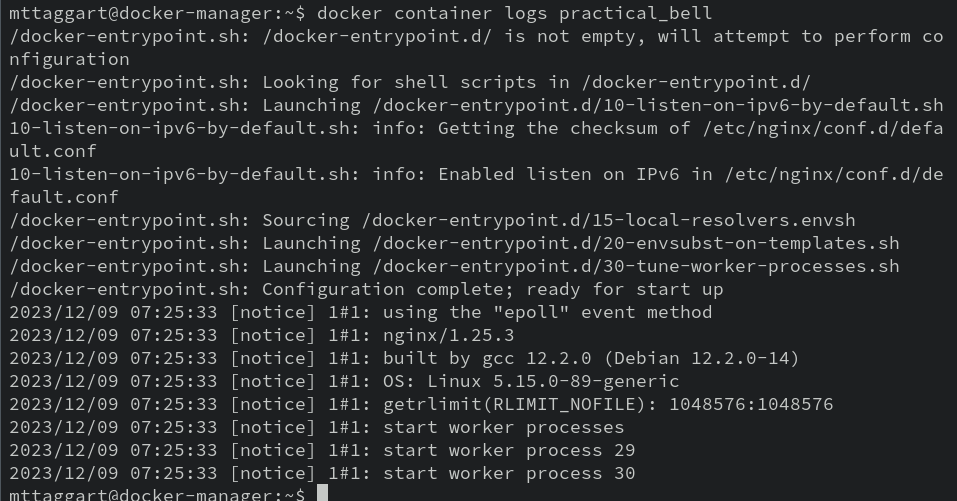
Of course we want to run a service like a web server detached. But docker container ls tells us that the COMMAND for our Nginx container may not be a simple shell. That means there may be useful output getting generated that we can't see. You know, like application logs.
Spoiler: there are.
But good news: we can take a peek at that output with docker container logs <container_id>.
Ports
Now, nginx is a web server, so ostensibly we would hope this thing is serving some HTTP for us. Let's check.
curl localhost
What gives? Turns out, although we launched nginx in detached mode there's more to do in order to expose network services from container to host. It's not so bad though—the syntax is -p <host port>:<container port>. Let's run docker container stop with the current running container ID, and then we'll try again with -p.
docker container run -d -p 80:80 nginx
Now, when we run docker container ls, we see an entry in the PORTS column that shows that the host port 80 is forwarded to the guest port 80.
Let's try curl localhost one more time.
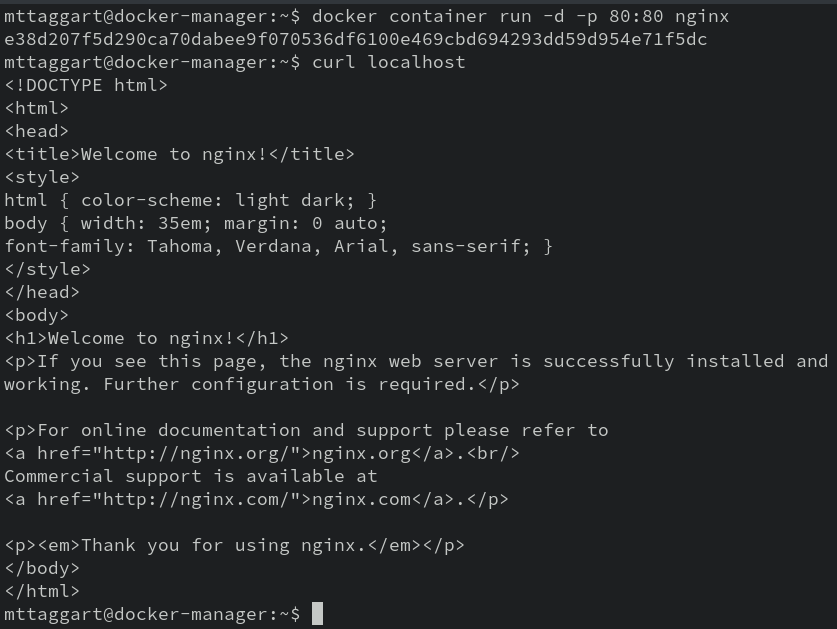
There we go. Our webserver is serving some web!
Adding Content
It's cool that we have a working webserver, but wouldn't it be cooler if we could serve, y'know, actual content? Not just the default Nginx page? How can we do that?
There are several ways. We'll start with the silliest first: editing files inside the container.
Taggart, this is a ridiculous way to deploy web content.
Yes it is! But you'll learn something doing this. Stick with me.
We already know how to exec to interact with our containers. Turns out, the nginx image has bash! Let's get a shell going.
docker container exec -it <nginx_container> /bin/bash
Echo
First thing we need to know is where Nginx is serving up content from. We could read the documentation on Docker Hub, simply cat out /etc/nginx/nginx/conf.d/default.conf in the container. That tells us the root of the site is at /usr/share/nginx/html. So that's where we need to put new data.
Let's try it out.
echo "<h1>New Page</h1>" > /usr/share/nginx/html/hello.html
We don't have to leave the container to test this out. Running curl localhost/hello.html should confirm our page is now accessible!
Echoing content into a file is cool, but not for large amounts of data. What if we wanted to use a text editor in the container? If we try to use nano or vim, we'll find they aren't there. But you know what is?
apt.
# Pick one
apt update && apt install vim nano
With our text editor within the container, we can now directly edit or create files. I'm going to edit index.html.
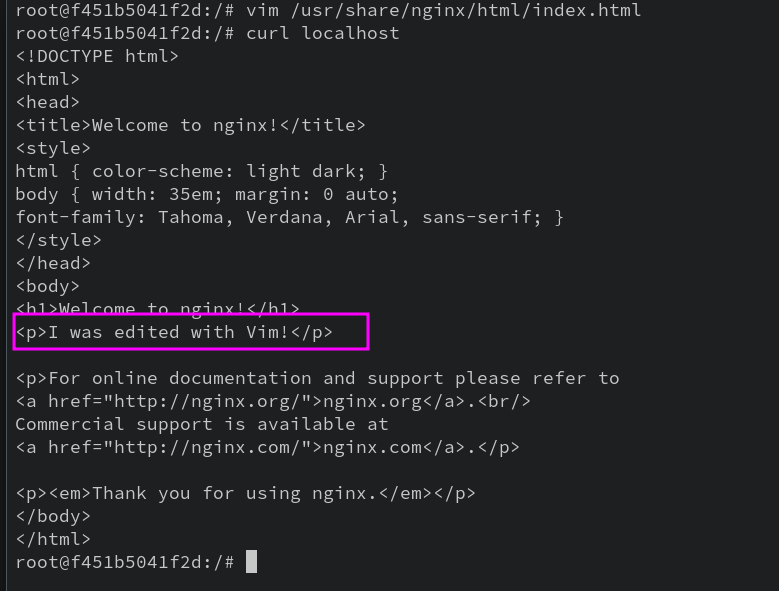
Okay, so now we know that we can add missing packages to running containers and make changes directly within them.
But this is a terrible idea, and goes against everything containers are supposed to do for us. Let's see if we can add content without executing command in the container.
Copy
Another option might be to create our content outside the container, and then move it into the container somehow. docker container cp does just that.
Exit out of the container (if you're still in it), and then let's create a new HTML file on our host.
echo "<h1>Made on the host</h1>" > host.html
Now we can use docker container cp to move this file into the container. The syntax is a little wonky. It goes: docker container cp <source> <container>:<destination>. Here's an example:
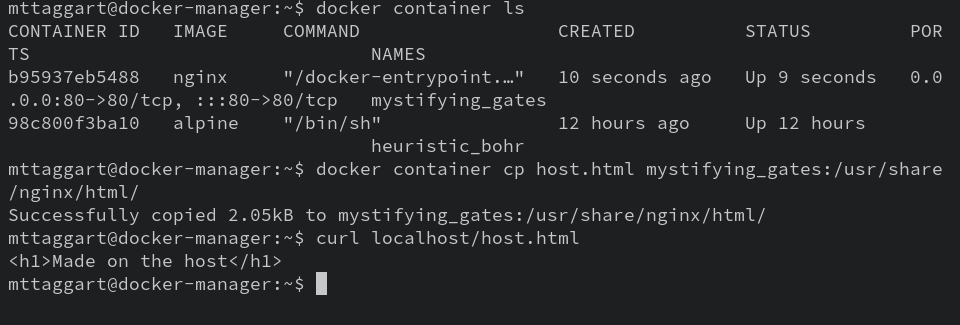
We can use the syntax in reverse to copy data out of containers.
While this is a step in the right direction, we still shouldn't have to modify the container after it's running. We need a way to include our content when the container starts.
There are two ways to do this: include the content as part of the base image, or mount the necessary data as a volume to the container.
We'll explore creating our own images in the next lesson. For now, let's check out volumes.
Volumes
Docker volumes are in fact a pretty deep concept, and we're only scratching the surface in this lesson. Still, they're pretty handy! We can use -v to mount an absolute path on the host to a location in the container.
So for our web content, let's make a new folder on our server.
mkdir webroot
And let's put a file with some HTML in there.
echo "<h1>I'm from a volume</h1>" > webroot/index.html
Now we can mount this directory as a volume in a new nginx container. Oh, you should docker stop <nginx_container> first. This is where we put all the command line options together, so it's going to look a little wacky.
docker container run -ditp 80:80 -v $(pwd)/webroot:/usr/share/nginx/html nginx
The result should be something like:

We've successfully overwritten the existing path in the container with our volume. This attachment of a host directory to the container is known as a bind mount.
As I said, there's a lot more to volumes, but we've finally arrived at a method for attaching content to a container that doesn't require us to modify a container that's already running.
Why does this matter? Remember that containers are intended to be ephemeral. We should be able to blow them away and bring up new versions without any harm to the data we care about. That means our persistent data has to exist separately from the container, as in our volume example. And we don't want to perform any manual steps post-provisioning on the container, which is why the docker container cp approach is not so great.
But congratulations; you've deployed your first containerized web application! It might be crazy simple, but the deployment principles will remain similar, regardless of of the complexity of the application logic. That's the beauty of infrastructure-as-code.
That's right—you're DevOpsing now.
Soon, we'll be making our own images with the resources we need inside. But before we get there, let's build on our knowledge of running containers to take advantage of some complex tools that can be difficult to install otherwise.
Check For Understanding
What is "detached mode"? When do we want to use it when starting a container? What is the command line option flag to do so?
Deploy a second Nginx container running on port 8080. Modify what it serves as its default page using a bind mount.